React is a JavaScript library that facilitates the development of frontend applications in a browser. On the other hand, WordPress is a popular content management system that many websites use. Apart from being user-friendly, it features numerous plugins. How can be ReactJS used in WordPress? Read along to find out.
Can we use React JS in WordPress?
Yes. You can use Reactjs with WordPress in cases where WordPress CMS manages React-based front-end content with the WordPress (WP) Rest Application Programming Interface (API). The WP Rest API is one of the significant WordPress features. It allows developers to build captivating themes and plugins. Through these features, developers can integrate WordPress CMS with third-party applications.
In advanced web applications, the CMS is designed to manage content on a website which can be tedious for the developers. With numerous Rest API possibilities, you can consider utilizing React-based headless CMS with WordPress for their JS (JavaScript) based web apps.
· Understanding Headless CMS
The term headless means that you can leverage the content management system as an all-inclusive CMS regardless of the system used to develop the front-end. Through Rest API developers can collaborate with JavaScript Object Notation-based (JSON) cross-technology interfaces.
WordPress Rest API generates JSON-based data which numerous web technologies can understand with ease. JSON is a text-oriented definition of JavaScript components that comprise key-worth pair data.
Below is an illustration of the potential of WordPress Rest API by combining it with React and WordPress as a headless content management system for a primary web application.
· Establishing a WP (WordPress) Website
Let’s start by establishing a WP website that will be the data source for the frontend React app.
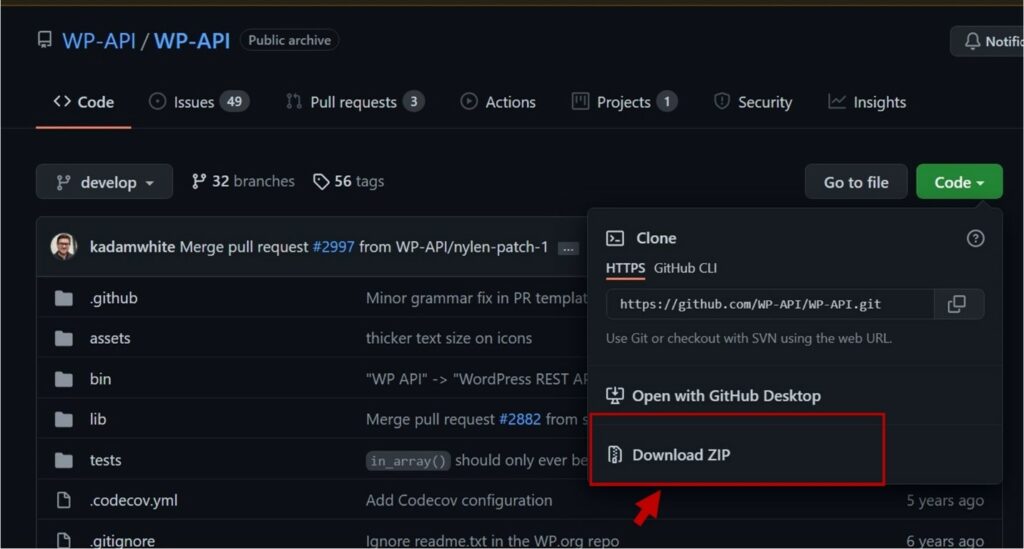
Download a zip file of the WordPress rest API plugin from git and upload it in your WP plugins section. Activate the plugin once the upload is complete. Doing so integrates and enables the WP Rest API in the WP website.
Click Settings, then Permalinks, and choose Custom Structure or Post name. Here, you will be working with API calls and you will need to download Postman, a Chrome extension. Enter the following URL in the Postman.
The URL will collect the posts information on your WP website. To create custom posts, the Custom Post Type UI plugin will come in handy. The custom post will appear when you use React with WordPress in the step below.
After installing and enabling the plugin, proceed to add a new post model. This tutorial covers a custom post format for books. Set the Show in REST API checkbox to true and also activate the Rest API base slug. This step is vital if you plan to use WP as a headless content management system.
Check all boxes for the data you want to acquire from the Rest API and save your changes. A new option will appear in the sidebar. Click to incorporate your new Book in your custom post format. You can create your first book with the sample information provided. To prove the availability of the data through API click on the URL in the postman. Your URL will appear like this:
https://exampe.com/wp-json/wp/v2/books
You can also incorporate other fields such as Publisher with ACF to RestAPI and ACF plugins. Install the two plugins and activate them. Leverage the custom field’s plugin to integrate the Publisher section for your books. Choose your preferred post format from the list then click Publish.
A new location will be created inside your custom post format where you can describe your book’s publisher. You have now created your WordPress for processing your data to the React JS web app.
· Developing a React Application
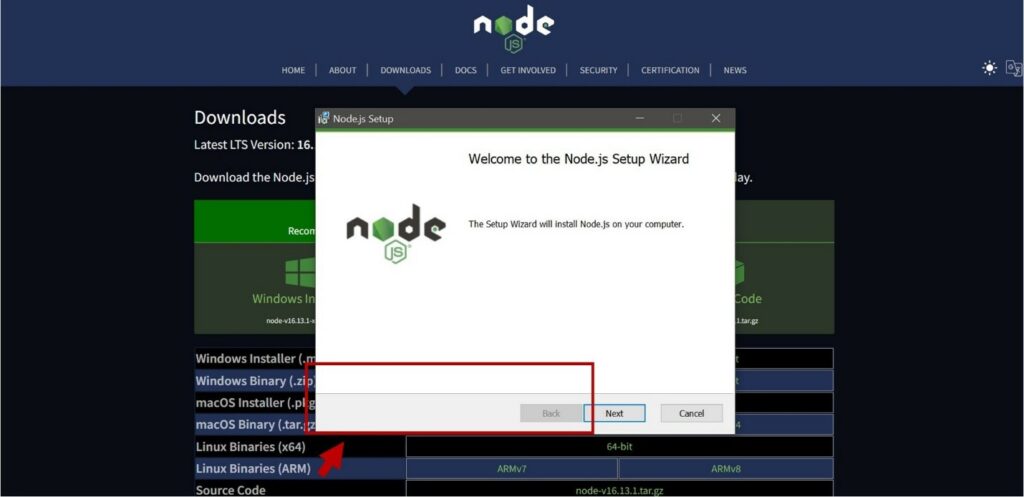
To develop React-based apps you should first install the following dependencies on your PC.
- NPM and Node JS
- Git for version regulation
- A text editor like visual studio code or sublime
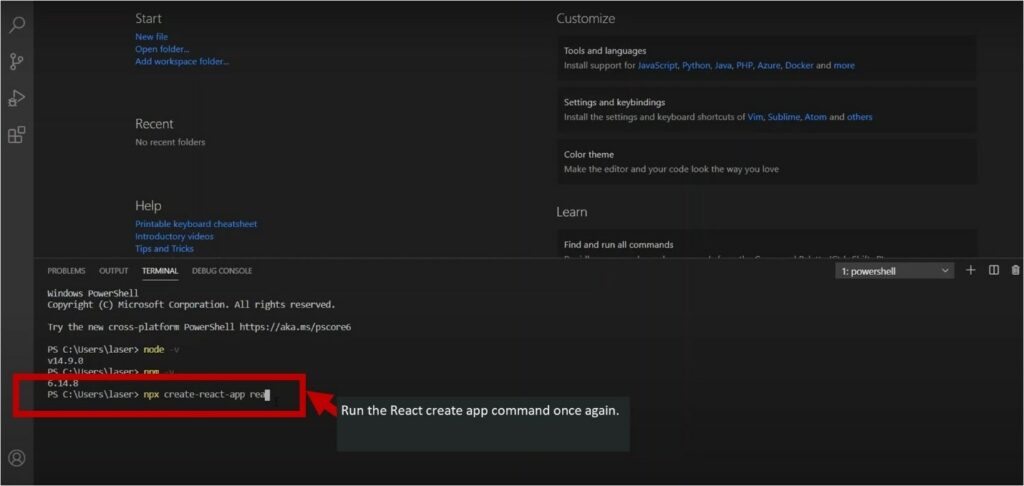
After configuring the environment launch the command line and run the npx create-react-app frontend code to set up the ReactJS-based project. After creating the app, change the directory to the application folder and type npm i Axios to initiate the Axios package installation for API calls.
- Launch the folder in your preferred text editor.
- Run the npm start command to launch the application
Suppose everything is working well you can start developing your web app with React while using WordPress as a headless content management system. Set up a new component in the SRC folder before setting up a new Books.js file in the components folder.
· Post Data Renderind on ReactJS
In the Book.js file, you will collect the information from the WP Rest API. Use the code below to request the Rest application programming interface end-point, in this instance books. It illustrates the data in JSON format.
import React, ( Component ) from ‘react’
import axios from ‘axios’;
export class Books extends Component (state = (books:[], isLoaded: false)
componentDidMount () (axios.get(‘https://wordpress-179008-1030625.cloudwaysapps.com//wp-json/wp/v2/books/‘) .then(res => this.setState(books: res.data, isLoaded: truen) .catch(err => console.log(err) render() console.log(this.state); return (<div>) export default Books
This code will demomstrate the series of data in the folder which will then be used in the render block.
Use the code below to call the books folder in the App.js file.
import React from ‘react’;
import Books from ‘./components/Books’;
import ‘./App.css’;
function App() return ( <div className=”App”> <Books/> </div>
export default App;
App.js is the entry location of your web app. As a result, citing the “Books” section inside the file is crucial
· Post Data Display on ReactJS
You can display the data by including the code in the render method. Here is the code.
render() (const {books, isLoaded} = this.state; return (<div> {books.map(book =><h4>{book.title.rendered}</h4> </div>
Instead of illustrating data in this section you can initiate a new component and call it “Bookselements.js” to separate it from the main component. Modify the render mode in the Book.js to:
render() (const {books, isLoaded} = this.state; return (<div> {books.map(book =><BookItems key={book.id} book={book}/> </div> );
Now you can render the Bookelement instead.
Include the following code in the Bookelement:
import React, { Component } from ‘react’
import PropTypes from ‘prop-types’;
import axios from ‘axios’;
export class BookItems extends Component render() {const { title } = this.props.book; return (<div> <h2>{title.rendered}</h2> </div>
· Exporting Default BookElement
The above code cites the book prop to acquire the title and other data.
Remember to include citations to the BookElement section in the Books Component.
The final BookElements.js version should look like:
import React, { Component } from ‘react’ import axios from ‘axios’;
import PropTypes from ‘prop-types’; export class BookItems extends Component {state = { author: ”, imgUrl: ”, isLoaded: false static propTypes = {book: PropTypes.object.isRequired componentDidMount () {const {featured_media, author} = this.props.book; const getImageUrl = axios.get(`
https://wordpress-179008-1030625.cloudwaysapps.com//wp-json/wp/v2/media/${featured_media}`); const getAuthor = axios.get(`
https://wordpress-179008-1030625.cloudwaysapps.com//wp-json/wp/v2/users/${author}`);
Promise.all([getImageUrl, getAuthor]).then(res => { console.log(res); this.setState({ imgUrl: es[0].data.media_details.sizes.full.source_url, author: res[1].data.name, isLoaded: true render() {const { title, excerpt } = this.props.book; const {author, imgUrl, isLoaded} = this.state; return (<div> <h2>{title.rendered}</h2> <img src={imgUrl} alt={title.rendered}/> <strong>{author}</strong><br/> <div dangerouslySetInnerHTML={{__html: excerpt.rendered}}></div> export default BookItems
How do I Add ReactJS with WordPress?
There are numerous ways of adding Reactjs with WordPress but the ReactPress plugin remains the easiest for adding a React app in a WP page. It lets you leverage the create-react app without adding customized configurations.
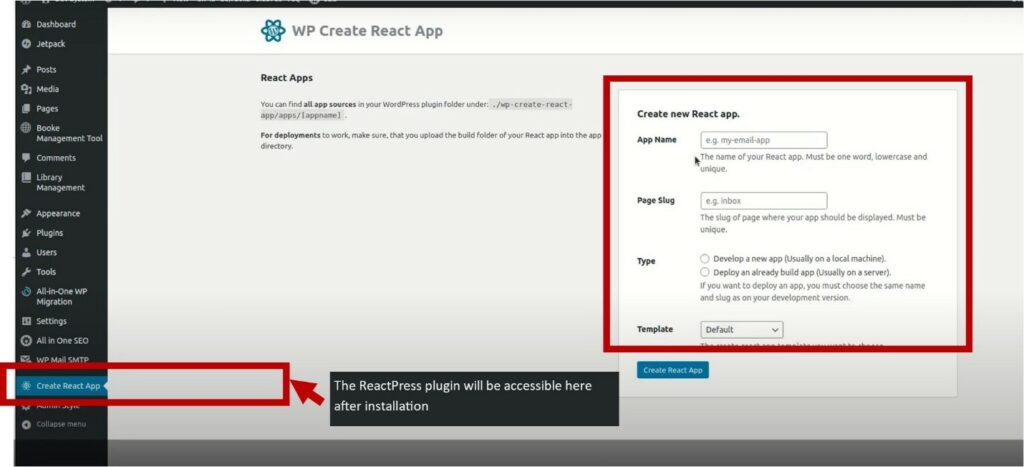
ReactPress automates the React integration on your behalf and also guarantees a smooth development experience by running the local React development server with your WP site theme.
· Why you Should not Utilize Headless WP with Server Side Rendering
Headless WP with Gatsby and Next.js or Frontity may be quite popular currently. However, these solutions make your application complex and you may end up losing out a big percentage of the WP ecosystem benefits, in this case, the plugins and themes. Here is the development to deployment steps you should beware of.
Create your local development environment
- Download and install ReactPress in your local WP installation
- Set up a new React application from the WordPress installation
- Set up a new React application by using the default and recommended: create-react-app from the command line, or the local WordPress admin
- Build your React application
- Develop the application
- Download and install ReactPress on a live WP site
- Set up the same React application here
- Upload your React application project on your live set for deployment.
Remember to repeat the first, second, and third steps until you complete your application.
How can React JS be used in WordPress?
The WordPress plugin leverages a shortcode to produce content from a React application. Remember, the React App is bootstrapped or developed with the Create App command-line tool. If you already have your Node installed proceed with the following steps.
· Create a WordPress plugin
Set up a React application inside the WP plugin with the create-React-application
Modify the React application to ease its loading process in the WP plugin or shortcode by deactivating code splitting for the CSS and asset files.
· Creating a WordPress Plugin
This is a standard single PHP file plugin that you can create in a folder in the WordPress plugins directory. For example, your path/wp-content/plugins/hello_world_react and inside that hello.php.
· Create React Application
Run the following code in the plugin directory from the command line
npx create-react-app helloworldreactapp
For instance: command to your path/wp-content/plugins/hello_world_react and run above cmd.
In the src/index.js modify root to hello-world-react as seen below.
ReactDOM.render( <React.StrictMode> <App /> </React.StrictMode>, document.getElementById('hello-world-react')
· Modify React Application
Trigger the application to generate one CSS file and one js file to ease its inclusion in the WordPress plugin. The next part will involve copying and pasting as we shall see below. Create a scripts folder in the React application and include an empty js file known as build-non-split.js. Now copy and paste the following details:
const rewire = require(‘rewire’)
const defaults = rewire(‘react-scripts/scripts/build.js’) // If you ejected, use this instead: const defaults = rewire(‘./build.js’) let config = defaults.__get__(‘config’)
config.optimization.splitChunks = {cacheGroups: {default: false} }
config.optimization.runtimeChunk = false
// Renames main.00455bcf.js to main.js config.output.filename = ‘static/js/all_in_one_file.js’
// Renames main.b100e6da.css to main.css config.plugins[5].options.filename = ‘static/css/somecss.css’ config.plugins[5].options.moduleFilename = () => ‘static/css/all_in_one_file.css’
In the React App’s root directory run node package manager rewire in package.json using the following steps.
// Change the line from this:
“build”: “react-scripts build”,
// To this:
“build”: “node ./scripts/build-non-split.js”,
Run npm run-script build to delete package-lock.json as follows.
Enable the plugin from the WP admin plugins
Set up a page and include the hello-world-react shortcode
Proceed to the page where you will identify the React application.
What is the best way to use ReactJS with WordPress?
There are numerous ways of using Reactjs with WordPress. In this section, we shall discuss how to develop an online course eCommerce store, with a special focus on how to create a React app that is connected to WP data powered by the WP Rest API.
· Querying WP Data
Your WordPress website should be running to execute this process. Use WordPress Rest API out of the box from your frontend by sending a GET request to /wp-json/wp/v2/{post type}. For instance, you can draw all your preferred posts from /wp-json/wp/v2/posts. Developers will use the fetch API to make frontend requests as follows.
fetch(‘/wp-json/wp/v2/posts’) then(response => response.json()) then(posts => console.log(posts));
· Querying the WordPress Rest API from React JS
Start by running the npx create-react-app react-app command:
Remember, NPX is integrated with Node.js to execute commands without necessarily installing them generally.
Now add a material user interface to the project as follows:
React-app cd then install npm @material-core/ui
Include the following posts elements to question the posts data
import React, { useEffect, useState } from ‘react’;
import CardContent from ‘@material-ui/core/CardContent’;
import Card from ‘@material-ui/core/Card’;
import Grid from ‘@material-ui/core/Grid’;
import Typography from ‘@material-ui/core/Typography’;
export default function Posts() { const [posts, setPosts] = useState([]); useEffect(() => {
async function loadPosts() {const response = await fetch(‘/wp-json/wp/v2/posts’); if(!response.ok) {// oups! something went wrong return; }
const posts = await response.json(); setPosts(posts); } loadPosts(); }, []) return (<Grid container spacing={2}> {posts.map((post, index) => (<Grid item xs={4} key={index}> <Card> <CardContent> <Typography color= “textSecondary” gutterBottom
dangerouslySetInnerHTML={{__html: post.title.rendered}} />
<Typography variant=”body2″ component=”p”
dangerouslySetInnerHTML={{__html: post.content.rendered}} />
</CardContent> </Card> </Grid> ))} </Grid>
The above example includes useState and useEffect, two React’s Hooks. useEffect helps declare the series of posts and give a callback to keep it up to date. UseEffect facilitates the running of the fetch code once the element is fixed.
To render a series of posts consider mapping over the posts bundle and return elements for each. Here are some tips to help you figure out how useEffect operates.
The callback can’t restore a promise, meaning passing an async function to useEffect directly is impossible.
An empty series should be approved to useEffect to ensure it runs at once.
· More Customizations
Many React JS and WordPress use cases can be overly complex than the above examples. However, it creates the basis for React and WordPress-powered web applications. Further, it helps developers to understand how the WordPress Rest API works.
To make the process more interesting in this case, consider easing the purchasing process for registered users. To do so you will need to make the price section more visible in the API. There are two concepts of doing so.
For instance, you can leverage post Meta. The most effective way to do so would be from the plugin perspective. However, executing the Meta box to facilitate field editing can be a daunting task.
You could also use custom fields that are directly added from the editor. In this case, you will need to modify the Resty API to make them visible.
Here is how to execute the post-meta-process.
function generate_course_type() {// … previous code from generate_course_type
$meta_args = array(‘type’ => ‘number’, ‘description’ => ‘The price of a course.’,
‘single’ => true, ‘show_in_rest’ => true, ); register_post_meta( ‘course_type’, ‘price’, $meta_args ); By setting show_in_rest to true, it will be exposed automatically to the REST API. Alternatively, custom fields created in WP’s admin interface can be exposed to the REST API by using register_rest_field: function get_price_field($object, $field_name, $value) {return floatval(get_post_meta($object\[‘id’])[$field_name\][0]); }
function register_course_price_in_api() {register_rest_field(‘course_type’, ‘price’, array(‘get_callback’ => ‘get_price_field’, ‘update_callback’ => null, ‘schema’ => null,
add_action( ‘rest_api_init’, ‘register_course_price_in_api’ );
Here, you highlight the acquire callback for the price section, from where you draw and modify the section from the post meta.
· Querying the REST API restores a payload as seen below.
"id": 72, "date": "2020-03-11T06:31:52", "slug": "markething-madness-with-frank", "status": "publish", "type": "course_type", "title": {"rendered": "Markething Madness with Frank" }, "content": { "rendered": "", "protected": false }, "price": 75.99, "_links":
With the price visible at the Rest API, you can include eCommerce functionalities in the application.
What are the Benefits of using React JS with WordPress?
React js is ideal for both mobile and web development. It also contains numerous developed components that you can use fast. Further, it saves developers from long hours of design. On the other hand, WordPress is a simple and popular method of creating a web application, website, or blog. Many people leverage plugins to customize websites and add various functions. Many WordPress developers prefer React.js because it eases the development of WP websites. Here are some of the benefits of React.js in WP.
· It’s Fast
React.js boosts the website design writing process. Further, the React.js render facilitates the representation of multiple functions. The REDUX can re-render the crucial elements on the web page. Professional frontend WP developers often prefer utilizing React because it renders services fast.
· Enables Developers to Re-Use Code Components
React is an open-source JS, graphical user interface-based (GUI) library. It helps complete user interface functions accurately and efficiently. The core benefit is that through React.js developers can re-use components that were created previously in different platforms that leverage similar functions.
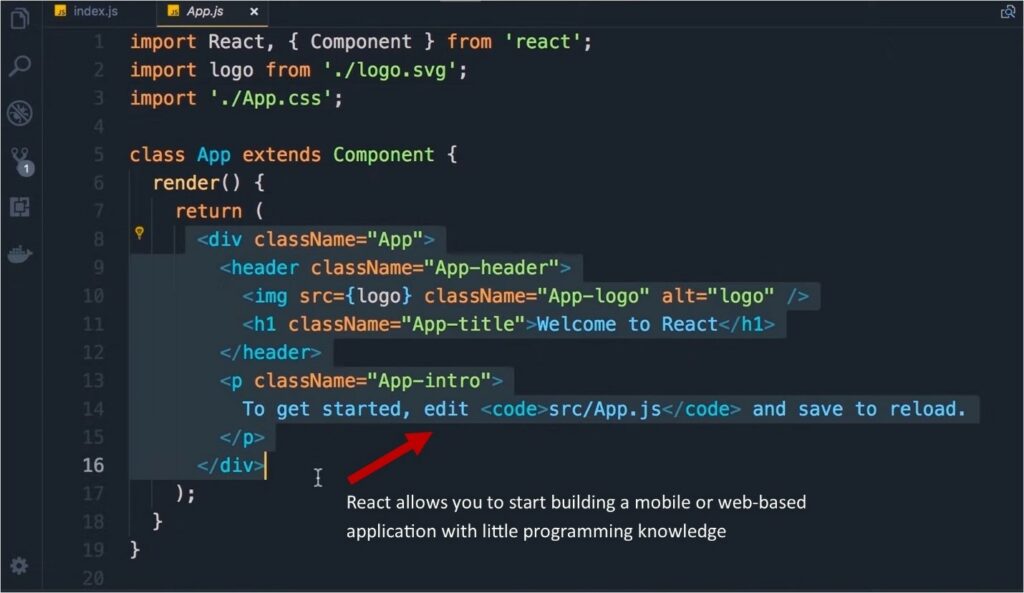
React.js is an effective library that enables users to achieve precision. Further, it allows you to start building a mobile or web-based application with little programming knowledge, or after a few days of using it.
· Enables Developers to Tell the Difference Between Data Separation and Presentation
Developers often lose key data during the rendering process. With React.js, WP developers can keep the data in React state temporarily. WordPress developers leverage the Rest API to discharge data to REDUX. React.js facilitates this data with ultimate presentation and separation. Suppose you store your information in REDUX to facilitate the new rendering process of some files, React.js keeps them in a temporary state.
· Simple Framework
Developers opine that utilizing React.js is way easier than some of the frameworks available today. JSX is a great combination of HTML and JavaScript. The framework is simple, enabling developers to build a website application using the essential programming language.
· Easy to Write
React is usually written in JavaScript Extensible Markup Language (JSX) context. The key objective of JavaScript Syntax Extension in React is to facilitate the navigation of the React components to make it easy and fast.
Conclusion
React and WordPress are excellent website development combinations. While WordPress gives you an easy CMS to manage your content, React provides a massive environment to develop powerful JavaScript apps. Developers can easily use React.js in WordPress as we have seen in this article.