How do you eliminate most of the risk in a development project? It’s simple. Make a mockup or mock it up. Here’s our guide to do this yourself for free. It doesn’t take long, it’ll make you think through the project more thoroughly, and the best part, it’ll guarantee you to save tens of thousands of dollars on your software project.
And, if I could tell you some of the horror stories about software projects that went badly, and I don’t mean by a few thousand dollars, I’m talking hundreds of thousands of dollars, it’d bring tears to your eyes.
One of the main problems for savvy business owners is that while they may know their customers, they definitely know their business, they may not know the ins and outs of developing a sophisticated software project. Are you nodding your head in agreement with me on this one?
So, while you may think you’re speaking with a competent programmer because they talk a big game and they use complex technical jargon, that doesn’t mean you can’t get the wool pulled over your eyes. Imagine you’re in a discussion with a possible development team lead, and they throw out the phrase – Yeah, we’re going to use an Amazon elasticsearch cluster deployed in the AWS cloud using python django as your core base code.
Ummm, whatever you say. You’re the expert… I guess.
If you’re like most of the people I speak to on a daily basis, the above phrase may as well have been in ancient greek. Or at best if you’re a bit technical, trying to recall french from secondary school lessons.
What makes things even worse is you may know what you want, but the ideas are really just in your head. You have no real way to relay those ideas into a concise, clear bridge so you can present them absolutely, without any misunderstanding with your development team.
We can call that bringing your idea, as fuzzy as it may be, to developer speak using our OneStop Slingshot prototyping process.
Why Onestop Slingshot?
Because once completed you can eliminate the risk of having to blindly trust in a developer that you don’t really know, and slingshot your project idea so that they can clearly understand your software idea.
The alternative to slingshot is blindly trusting some developer and having to wait 2 months for an MVP to see what they come up with after they’ve already programmed your ideas. That’d be gambling, and you’re a prudent business professional that knows when you’re putting up money from your own department or company, we don’t gamble. What happens in Vegas, stays in Vegas and gambling may remain on the craps tables, not your software project.

I’m about to lay out a core piece of our unique selling proposition, 100% free and without charge. Do with it what you may, I believe the world is an abundant source of ideas that should be freely shared. It’s all about execution, and I leave that up to you.
Our OneStop Slingshot prototyping process explained
In order to get going in any type of software, you’ll need what is called a minimum viable product (MVP).
This is a commonly known term in the software development world, and usually should take 2 months to produce. Of course, the more features you want, the longer it will take and the more chance there is to have problems arise. Going back to my hundreds of thousands lost on a software project example, the client went to court with the developers but the burden was on her to prove that the developers intentionally mislead, maligned or stole the code that she had already paid for.
Imagine trying to convince a judge or jury that aren’t experts in programming that defendants code didn’t do what the customer paid them to do. Basically, impossible. Which is why she chalked the experience up to an extremely expensive mistake and will never try and develop software again and hence forth moved on to investing her money into something she did know how to do, buying buildings and renovating them.
But it doesn’t have to be this way.
Software development shouldn’t feel like rolling the dice, not when you have possibly tens of thousands of dollars/euros at stake just to see a glimpse of the final product. There is a bullet proof way to take the ideas from your head, and put them into a near perfect and working version of the application, or software service you’re trying to create.
While many firms may talk about an MVP prototyping tool, I haven’t seen any with the proven results. Frankly, there is no magic wand here except for you as the visionary to put pen to paper and think about what exactly it is you want to accomplish. Spock is not going to be able to do a Vulcan mind dump on you, you have to do the work.
But the work is well worth it and could save you tens of thousands of dollars, perhaps even hundreds of thousands once done.
This process can help you produce in days what would take a developer a minimum of 45 days that will still only be full of bugs until the programmer has everything ready to start testing the MVP.
Step 1 – It starts with User Stories in plain layman terms
User stories are an essential building block for developers to know exactly what they need to do.
If you imagine your software application as a house, with the foundation being the core technologies chosen at the outset of the project, the user stories are the critical understandings or building blocks of what your application needs to do to solve your core pain point.
Each one of these building blocks will help to solve the core frustration that will make your final software a success. One block added upon another creates the first room in your software house. Your MVP can be considered a room in the overall house of your application, which with any luck could end up being a sprawling Versailles type palace.

An example of a user story could be: user creates login and password to enter into application.
That’s a building block and a single step that needs to be taken towards building your application.
To better illustrate how you can walk through your user stories, I can show you an example from the previous blog on how we pre-sold thousands in a potential crypto trading portfolio management tool just last month.
The frustration I had found in the crypto trading space was that crypto traders, HODL’ers (those that hold crypto through up and down markets no matter what) or investors were that they may have hundreds of thousands of dollars/euros, even millions worth of crypto spread out over multiple exchanges, online and offline wallets, or ICOs with no single dashboard to track everything. In any given day, their total crypto portfolio could be up or down tens of thousands of dollars and they had no real way of knowing exactly how much.
This is a real pain, believe me. Worthy of building a Software as a Service application, so I went through our onestop slingshot process to map out that pain, so I could get a 100% accurate development cost on what it would take to build.
The easiest way to show you our Onestop Slingshop prototype is to walk you through this application example, because it’s mine to give away since I found this pain and I’ve already worked through the user stories to create the perfect dashboard application. An application that some users were happily willing to pay me $200 a month for, and even pay 12 months in advance sight unseen without a line of code having been written.
How to start? Just start with simple words of what you want to achieve.
In my case, I simply start by journaling what I wanted my application to do. Here’s the exact example of what I came up with for this crypto portfolio tracker application.

The above are very simple illustrations of what I had to write down for my development team to understand exactly what I wanted to accomplish to solve the pain of not knowing in a single glance what all of my potential clients crypto holdings were at any given time.
While you may not understand what the problem is, you can see from the illustration above that a development team can now at least get an inkling of an idea what they will need to be doing to help solve this problem. The fog of ideas in a creators brain, is now at least being put to paper (in this case, digitized in note format).
This process, if done properly, shouldn’t take longer than 2 or 3 hours. It’ll be well worth your time to write these out, even if it takes a little longer. But, it shouldn’t.
Step 2 – Take human form and convert to developer speak
In this first iteration, you shouldn’t worry about whether the frustration, pain, feature or task you’re talking about can directly translate to a single programming function. Get your ideas out on to paper.
In the example above, I’ve taken a yellow marker to each verb centered action, eg – get alert, reconcile portfolio.
Each of these verb centered actions tells you that you’re likely looking at a user role that needs to be better defined and placed into a developer speak user story.
Example – As a registered and authenticated user, I want to set an alert threshold for coin x, to be sent via email or phone when that coin reaches y amount.
Taking the above, you can now imagine a screen in your application that could look like this.
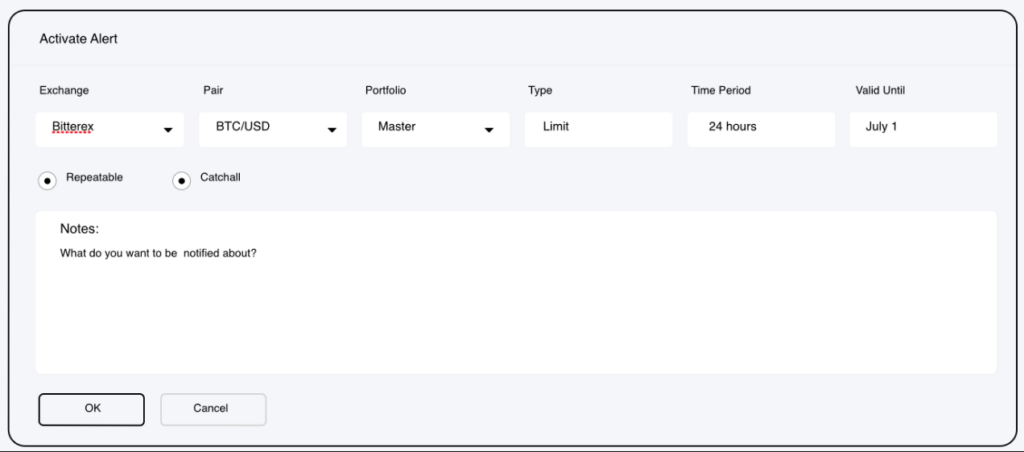
In looking through my examples above, you can see that there will be quite a few of these user stories that need to be mapped out to piece out full understanding so the developer through his years of experience can now respond back to you.
OK, I know how to do this. I’ve done this before, and know this should take me 1.5 hours to complete and my cost for doing this is $xx.
Now, we can begin laying the sketch work to slingshot our development plan into action. By going through these user stories, we can start taking our ideas as the business owner and actually formulate them on to paper, thereby thinking them through more intently. You’ll be giving your ideas focus and clarity, and the kind of precision that no developer could understand by having a simple conversation with you in a kick off call. Or worse, in a chat room on a freelancer website after you’ve tried to write down in layman terms what you think you want.
The hard part of course is going through all of these actions for your development project. I’m sorry to say, there is no other way to safely move through your project without you at least understanding exactly what it is you want your development team to produce.
The good news is that by doing this, you’re well on your way to ensuring you won’t gamble away possibly tens of thousands of dollars just to get a glimpse whether your developers fully understood the main purpose of your application.
The second piece of good news is that translating these out shouldn’t take more than another hour or two. It’s also OK if you don’t exactly know how to translate these into developer speak. Just do your best job, because anything is better than nothing and at least the attempt you’ve made will be decipherable to your future developers.
Step 3 – Take pencil and paper and start to map things out
Now, we can start to have a little fun with the right side of our brain (that’s the creative, fun side!)
Grab a pencil and paper and let’s start to draw some things out. I like pencil because I think it’s wasteful using pen and we can change our minds with pencil. I also just use plain white paper that I grab from my printer. Pencil and paper is something anyone has at their disposal, and it’s free form enough that we can start laying out the groundwork for a potential user interface, or UI.
Start by trying to classify each of your user stories into their own corresponding group.
Example groupings for my user stories in the crypto portfolio tracker were.
Investment Types
Various Pair Holdings – examples, BTC/USD, xrp/btc, ada/eth, btc/eur, zcash/btc, doge/btc, ada/usdt, eth/usd Investments in ICO’s – not on exchange, on exchange but not tradable MasterNodes – staking coins, wallet positions that automatically grow Mining rigs –
Sources of Information
Crypto exchanges – examples; coinbase, kraken, bittrex, binance, okcoin, cryptopia, bitbox, quoinex, Offline wallets – trezor, nano ledger Paper wallets –
Online wallets – Cash on exchange – Mining rigs? MN wallet bots –
Info Wanted
- Total balance
- Realised P & L
- Unrealised P & L
- Date bought, sold
- Price bought, sold
- Action – bought, sold, stopped out?
- Currency pair bought, sold
- Multiple decimals needed
We can see here that we’re still in a very raw form of information gathering, but we’ve now put some solid thought into the features or information that we need to get to help solve our core pain. Each of these values could represent a small break out piece of screen in our application.
I like writing these out on paper as the brain responds differently when sending signals directly to the hand to write things out. Even if you prefer to bang things out on the keypad, I urge you to get the pencil and paper out because there’s something about doing it by hand that just makes us more creative.
Once you see your groupings in plain paper, you can begin to understand the likely screens you’re going to have inside of your main application.
For my crypto trading portfolio tracker it was obvious that I would need a few core sections to my application.
The image of that initial drawing can be seen below.
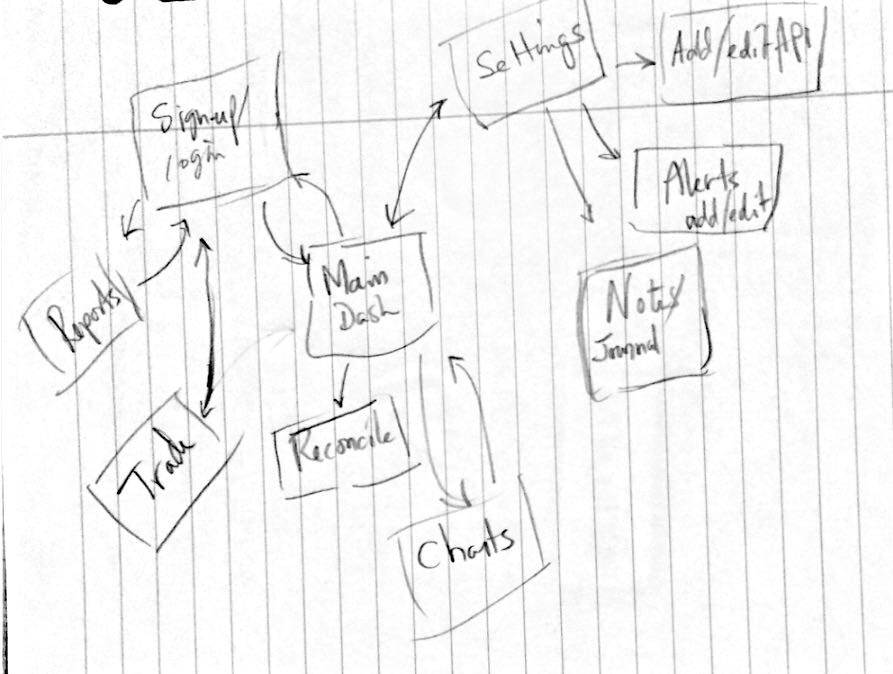
It’s not pretty but at least I have an idea of what screen my application is likely to need, and I can use this as a base to understand what type of application I will be building. You may not understand my interpretation, but once you do yours, you’ll understand your own thinking and it’ll be easier to connect the screens.
Step 4 – What type of UI do you like?
Now, we’re seeing progress and on to more fun stuff. Drawing out a rough idea of what our application could look like.
As we’ve all been using the Internet now for the better part of our adult lives, or at least for the last 10 years, we’ve probably come across some examples of applications we know and like.
For me, my portfolio tracker was going to be a metrics dashboard application. The name itself, portfolio tracker implies the type of metric tracking applications that have already got this figured out.
Why reinvent a portfolio dashboard UI design when you know there are dozens of very successful ones that have already spent millions of dollars/euros mapping out a functional user interface. Just borrow their hard work and redeploy it for your own purposes.
You can translate your own application into the same type of search. Simply go out and find some applications in the same industry, field as you, and that are trying to essentially perform a similar function as your intended future application.
In my case, I have my own SaaS and I had been using the application chartmogul.com to map out my metrics. Keep in mind, this has absolutely nothing to do with tracking a portfolio, but I was very happy with the user interface of chartmogul, so my first example screen came from them.
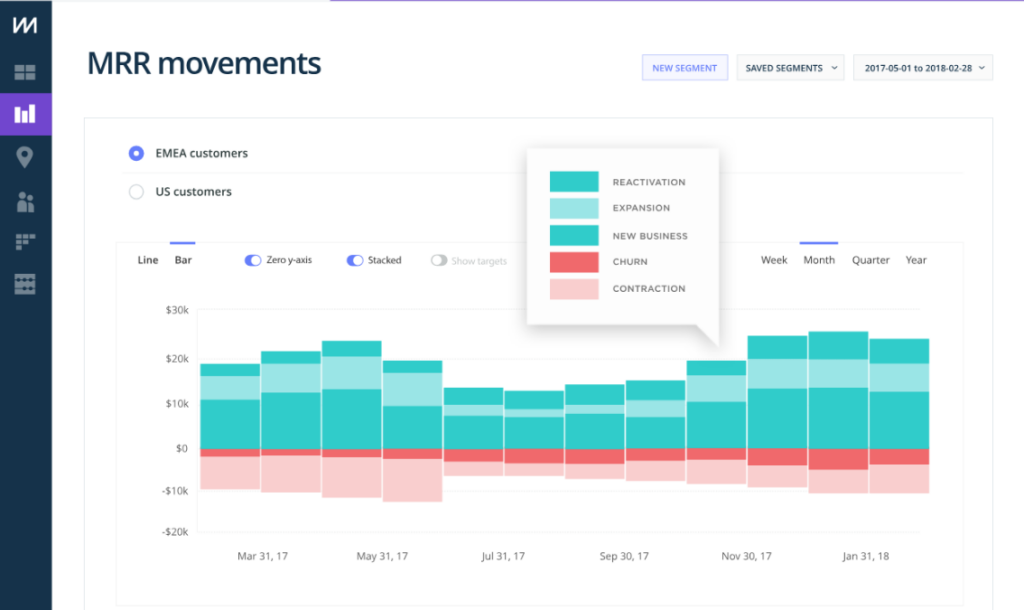
Pretty clean and slick, right? I thought so, and I know they’re killing it in the SaaS world, growing by leaps and bounds each month. So they must know what they’re doing, and if they were bad at design, their customers would tell them as much.
Upon some further research, and a bit of feedback from my own network by posting out on Facebook or in a private FB group you can get a lot of great examples.
Hey, I’m wondering what applications you guys like to do x, and what apps do you absolutely love?
You know how people love to hear themselves talk in facebook. Inside of a few hours you’ll have no shortage of great ideas.
Geckoboard.com was another example I liked, that I also knew was very successful.
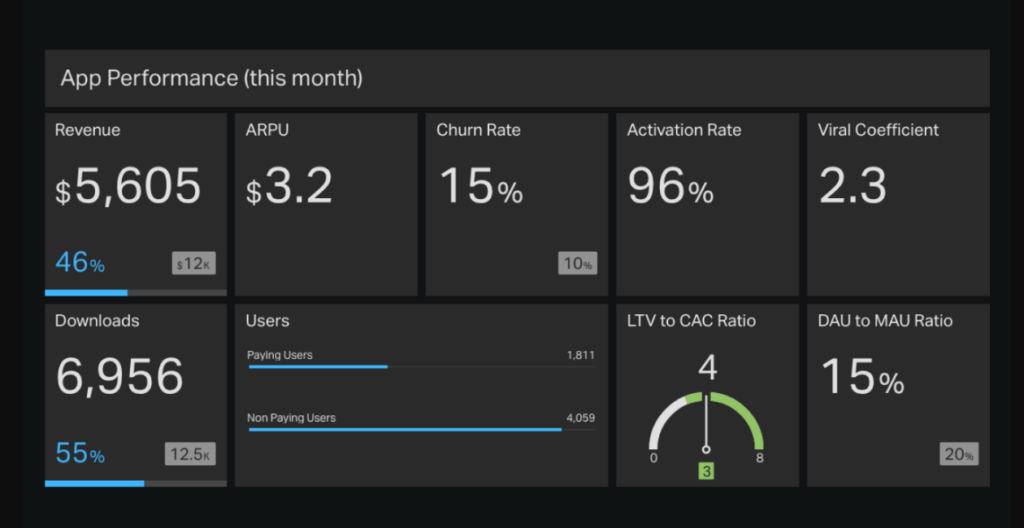
My bet is that you can do the same thing. If you’re building a realtor team communication application, maybe you like the looks of slack.com.
If you’re building a legal application that searches and finds the appropriate legal documents for your client, maybe you like the look and feel of dropbox.com. And why not, they’re a Silicon Valley darling, that likely knows a thing or two about successful user interface design. Steal from them as much as you can, they won’t mind!
Step 5 – Take what you have and put pencil to paper to draw out your user interface
Now the really fun stuff starts to happen. You’ve created your user stories, boring and tedious, but so essential. You’re beginning to research what you know you already like, and you’ve already grouped your user stories into screens that you’re likely going to have.
At this point, I don’t like to limit myself to what I think is a feature that is needed for my MVP or not. If I’m not a programmer (even if I was, and I used to be) we don’t need to put any restrictions on our creativity. We’re going to think big picture how our end dream result will look somewhere down the road, even if that’s years from fruition. Think Versailles palace right from the beginning, or at least a wing! Map it all out, and we can always slash features later once we know the cost of them. By that time, you’ll have spoken to your development team, and we can easily edit our Onestop Slingshot prototype in the app of our choice.
Nearly all applications need to have a home page, or a dashboard. Draw it out physically with pencil and paper. If you don’t like where something looks, take your eraser and move it.
Because we’ve already done the research on applications that we already like, we can now use screenshots from what we know works, and copy that style. Is the main navigation menu along the top, or does it go down the side? What do you like or prefer? This is your app, use what you like.
In your research, what is the main item on the page that draws your eye? That should be the most prominent and largest feature on the page.
For example on an Apple iPhone, one of the most prominent features is the home button. We know that even if we’ve never used an iPhone before, Apple wants us to press that button, and by doing so, it’s going to perform a mission critical function. You should think the same way for each one of your screens.
The trick here is limiting the importance of each feature you want to provide because there can really be only ONE most important feature per screen, or at most 3.
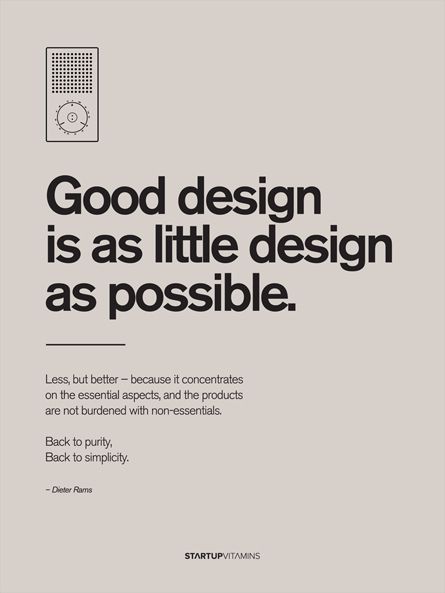
When in doubt, remember, less is more. Use the below for inspiration.
In my example crypto portfolio tracker the most important thing for my crypto traders was knowing their account balance spread out over all of their accounts. So total portfolio balance had to be the biggest and most prominent item on the home or main dashboard.
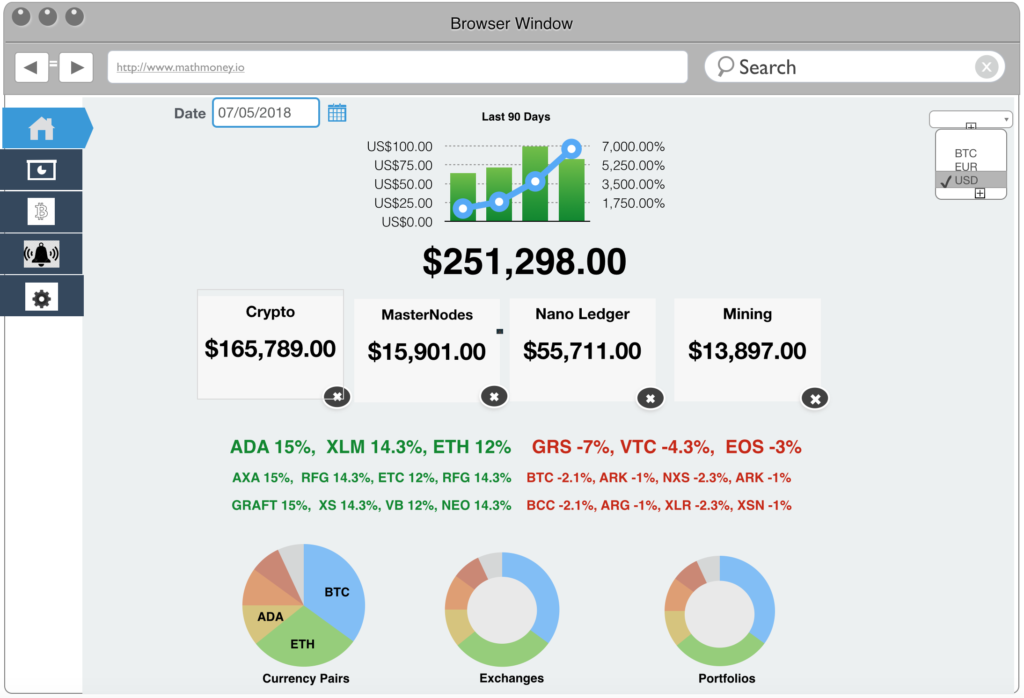
Of course, there was heaps of other information, but all were made less prominent and were put down lower on the page.
Most successful designers of UI agree that less is more when it comes to designing. We don’t expect you to become proficient designers, especially if you’re already experts in your own business or field which has nothing to do with software development. The idea here is not to get anything perfect, it’s to get you thinking more about your application so you can convert your brilliant ideas into developer speak so that when you have your final Onestop Slingshot prototype in your hands, a developer can look at it inside of 5 minutes and roughly know what you’re talking about, and about how much it will cost to build.
Step 6 – Converting from rough hand drawing to PDF files
At this point, we can now fire up our favourite presentation software and start putting our rough hand drawings to digital renderings.
Some applications that I like are:
- Keynote – Apple’s version of powerpoint, and a favourite of mine to use since I use mac.
- Powerpoint – Microsoft business tool that nearly every business professional should be well versed in using.
Lucidchart.com – This handy little tool is a web based flow chart builder that you can learn how to use in an afternoon, while you map out your UI on the fly. If you’re only doing this one software project and need it for this one time, they have a free trial too. I have used this in the past, but don’t currently use it because I want my prototype to involve an element of how I want the final application to look as well. Lucidchart is strictly for mocking up your MVP. You’ll later have to develop a sexy UI, but that’s OK! Most developers have their in house UI experts, we can help you here too.
Balsamiq – Balsamiq is another tool I’ve used and it’s great but it does cost money for a license and therefore only makes sense if you aren’t happy with ones of the above.
Depending on how handy you are with using these tools you can end up with something of varying degrees of what your final product could look like. At this point the most important thing is to map out what you think you need so the developers can see exactly what they need to be building.
The above image is an example of the first iteration I made using keynote. I think this version is terrible, but it was good enough for me to show my customers and potential customers what I was building and to even sell over two thousand dollars, before the application was even built. Imagine being able to collect funds from your potential customers before you’ve spend a penny on building your product?
The reason I made this version in keynote was because I was able to build out the version in an afternoon, shorter in fact than it’s taking me to write out this blog post!
You can see from my example that I have the total ($251,298.00, a fictitious number that will have gone down a lot in this nasty market) as the most prominent item on the screen. That’s what my traders wanted to know, their total spread out over all the exchanges, wallets and whatever other crypto investments they had.
You can also see that it’s not pretty. But if you’re only planning on showing this to your development team then it’s enough for them to know exactly what they need to be programming.
If you want to take it a step further, you can open a fiverr.com project and get your rough drawings mapped out for a few hundred dollars, or less. It all depends on what you want to have as a final Onestop Slingshot prototype. Leave a comment below and we can point you in the direction of some of our favourite fiverr designers.
Because I’ve been making prototypes for nearly a decade, I wanted to spend more time and bring my UI closer to something that could be my final product. If you want something a little more slick and don’t mind spending a few hundred dollars for something that’s worthy of being able to show your investors or clients, then sing out. We can help!
Below is an example of the final product. You can see that it looks nearly as good as what you’d expect from a multi-million dollar enterprise, and I was able to do this inside of 3 or 4 days and it cost me next to nothing to make.
Even more importantly, I could sell my intended project to potential customers, people that I didn’t even know, and I could take this to my development team and get an extremely accurate quote for this project, down to nearly each feature set.
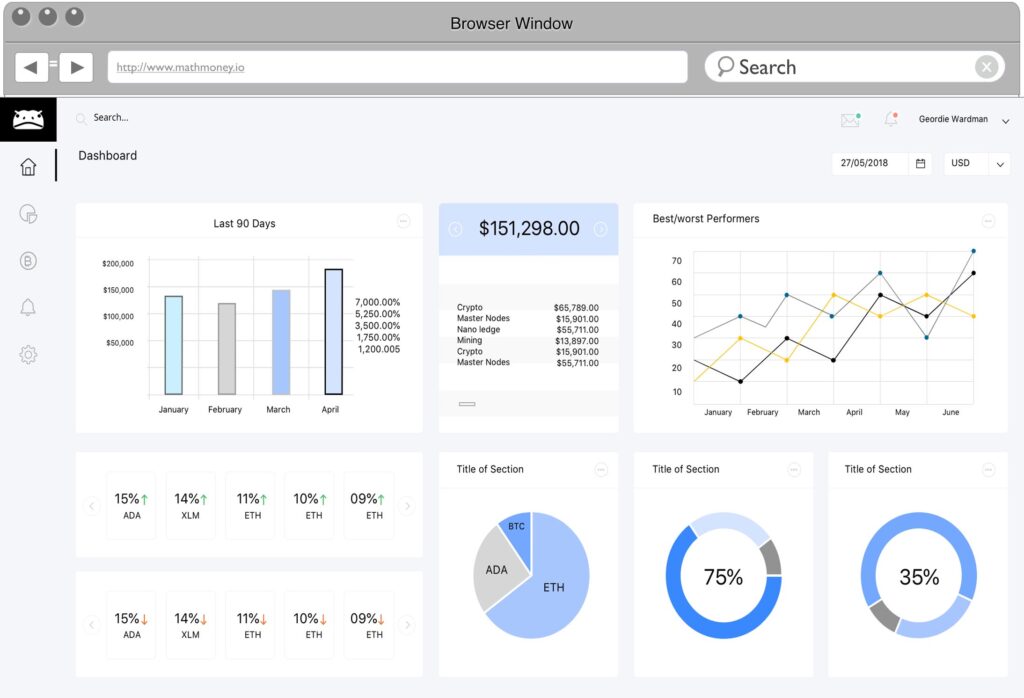
The beauty of this process is that you can clearly create every single screen in your dash and they’re all editable. In my case, you can see from the navigation bar that I had 5 main sections or screens.
Each of these screens had their own important information, but when broken down they’re all just simple user stories when mapped together to build our Onestop Slingshot prototype that any developer, anywhere in the world can take a few minutes to read over and know exactly what they’re dealing with in your upcoming software project.
Step 7 – Putting it all together, and creating a clickable pdf or HTML files
The final stage of your OneStop Slingshot prototype is putting all the screens together, and then linking them with clickable links. This may be above and beyond what you need, but it can be quite useful if you want to show the application to a potential client, investors, or your own customers before you’ve spent more than a few hundred dollars to get this made up.
The process is just as it sounds, highlighting each area and creating hyperlinks within the document on where the user will be taken. I’ve even made pop up screens that show configuration aspects within the document and converted it to a mobile friendly document, put it online on my own website, and given demonstrations to customers that didn’t know the app wasn’t fully live and ready to purchase.
That’s a powerful sales tool!
I don’t recommend blowing this full version out however until you have already spoken to your development team because you need to discuss with them what the main features are that you will need to solve your core problem for your customers, or yourself if it’s an internal application. An example is that a reports section could cost $10,000 to develop and it may not be needed in our MVP. Thus, don’t create a clickable pdf or HTML file until you know exactly what you want in your MVP. If your intent is to sell a future product? By all means, blow it out, build an imaginary Versailles.
Also, you’re developers will be in the best position to give you an estimate on each feature before you build it. There’s no sense in building hyperlinks to show your customers, team, or investors parts of the application that might not exist in your MVP.
Wrapping things up
If you want to book a call to speak with me, a seasoned software entrepreneur with over a decade of experience doing this for our clients, and for myself, click on the Book A Call Now button below, and we can go over the details of your particular project.
A core part of our services is providing professional, clean looking slingshot prototypes to cut weeks down on development time and give your potential development teams the fastest and most accurate way to quote your software project.
Don’t gamble your software projects budget away by trying to skip this step. Take the time to do it yourself by the steps we’ve outlined here, or give us a call. Our discovery calls are only 15 minutes, we can guide you through the best course of action and it won’t cost you anything to speak with us.
*** All of our software entrepreneurs are seasoned business owners, that have years of experience building software. There is no commitment, or cost to speak with us. We are here to answer your questions, and get your software project up and running as quickly as possible.

