React was once a shiny new JavaScript library that everyone seemed to want to learn and use. Today, React is a popular JavaScript library with millions of devs using it.
Naturally, an ecosystem of tools, documentation, dependencies, and other things has grown around it. There are new and old tools made for the React ecosystem. These react dev tools can make your life as a frontend dev easier, more productive, and even fun.
In this guide, we spotlight helpful developer tools for the React library. We shall explore everything from purpose-built IDES to extensions.
If you are new or experienced in React and want to know what is available to you aside from the library, then you come to the right place.
What are React dev tools?
By its nature as a frontend Js library, one would argue that Reactjs is a tool that you can use to create modern web interfaces and apps. What qualifies as a React tool? Why do you need one? Can you develop with React without these tools?
React tools are additional, mostly third-party software you can use while developing with React. Most of them are made to make you more productive, for instance, making instant and helpful code suggestions or autocompleting known code for you as your type.
Other React tools go a step further and fill out complete boilerplate React code for you, add dependencies, take a screenshot, organize code, and create reusable components/subcomponents. Some help with debugging, code testing, managing HTML, automating your commits, cleaning your code, etc.
Most of the stable and widely used React tools are browser-based or IDE/code editor-based. You do not have to worry about installing separate mini-programs and running them all the time. You can access web-based add-ons from any computer with an internet connection.
Why Do You Need React Developer Tools?
React as a library is quite complete in that it has all you need to develop any web interface or app without these tools. However, Reactjs tools have the following advantages:
Tools make you more productive- Think of React code completion or code helper tools that you can add to your text editor or generic IDE. Instead of typing whole blocks of text, say when doing inbuilt functions calls, the code helper or completion tools can do it for you.
Some tools save you time- Can you imagine having to do manual testing while you code your React app? Some of the react tools on this guide will save you a lot of time so you can complete your project faster.
React tools add functionality- You can add some of the things Reactjs lacks through a third-party tool. For example, you can add a profiler if you need one.
What Is the Difference Between React Dev Tools and The Chrome Developer Tools?
Some Reactjs tools are made for the browser, others can be installed on your IDE, text editor, or as standalone applications. Chrome React developer tools are packaged as extensions or plugins that you can install in Chrome through the Webstore or from the creator’s website.
Chrome developer tools can be accessed directly on a live browser by clicking developer tools. They are mostly used to debug, test, and inspect individual elements on a deployed React app. However, there is no limit to what you can do with chrome React dev tools as some do more complex tasks like adding or editing CSS.
Independent React Dev tools are packaged as standalone apps or extensions that you have to install on your software development computer or on your text editor/IDE. Standalone React development tools have more features than Chrome dev tools.
Should I Use Chrome Dev Tools or React Dev Tools?
For small projects, you may find that you only need one or two specialized React dev tools to do critical tasks like debugging. However, most React developers use several chrome dev tools to inspect, optimize and test their projects on a live browser window.
How to Install and Use React Developer Tools
The easiest way to install most React developer tools is by downloading them from the creator’s website or GitHub page. For those used in the browser, you can download them from your browser’s marketplace or extensions page. Using the React development tools is as easy as right-clicking on an element on your browser and choosing inspect then finding the button labeled React dev tools on the new tab interface.
Standalone React tools are also equally easy to use and also come with documentation to help you with specific actions. Remember, you don’t have to learn every aspect of a tool to use it, always refer to the docs when you need to do something new.
Top 7 React Developer Tools for Increasing Productivity
Here are 7 handpicked React development tools you can use today to improve your code and make you more productive as a React developer. Some of these are paid for while others are free to use both for personal and commercial projects.
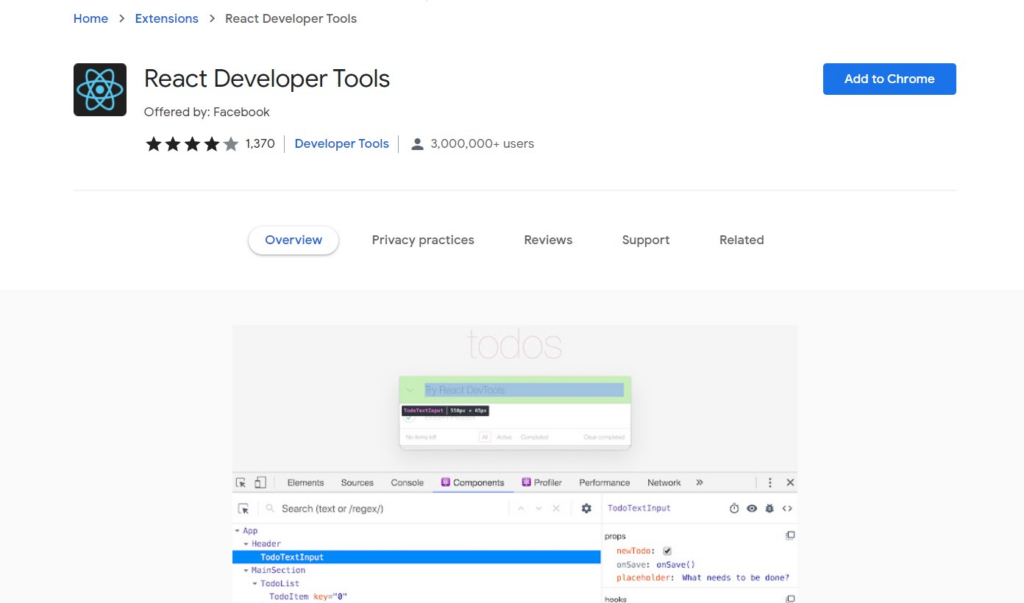
React Developers Tools
“React developer tools” is a bundle that is available for both Chrome, Firefox, and other popular browsers. You can install these tools directly from the Chrome Webstore, the developer’s repository, and browser-specific websites.
Most React developers use React developer tools On Chrome hence why they are often referred to as “Chrome React developer tools”. However, there are react developer tools for Firefox, react developer tools for Safari, and react developer tools for Opera and other browsers. Look for react developer tools download links for your specific browser and you should be able to add them easily.
React developer tools have many features and shortcuts to help you automate a range of tasks. They also help you do crucial tests on your Reactjs app. These are free and open-source tools meaning you can use them on personal and commercial projects.
You can use React DevTools to debug, access the CLI, track interactive elements, view and interact with React source code, etc. Here is a summary of the features that you have access to with React developer tools:
React debugging
Console access (CLI)
Tracking interactive elements
Examining your React code’s tree, hierarchy
Viewing source code and much more
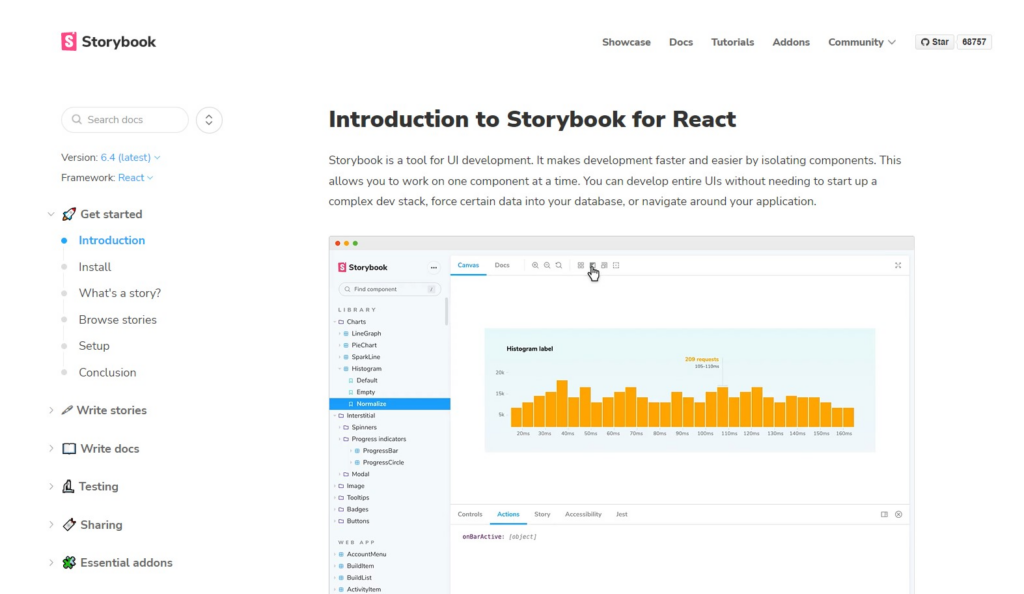
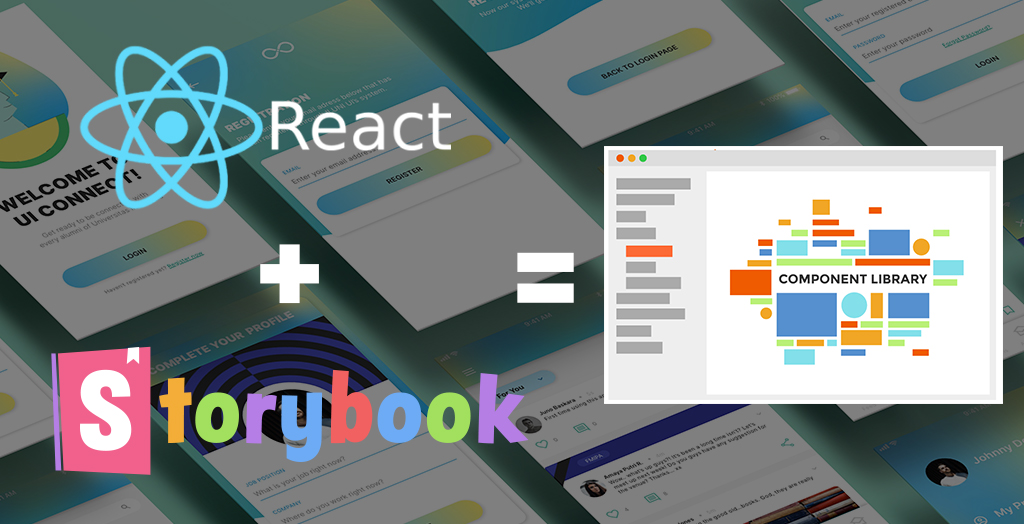
Storybook
Storybook is a favorite among experienced React developers because of what it does and how it goes about it. Storybook as the name suggests helps you visualize your React app, allowing you to quickly test your UI components’ appearance and interaction.
The name story comes from the way the tool allows you to create separate sandboxed stories for each element’s behavior. Storybook is a clever little tool that React UI devs have come to love. You can download Storybook from the creator’s website or GitHub. It’s a must-have for React.
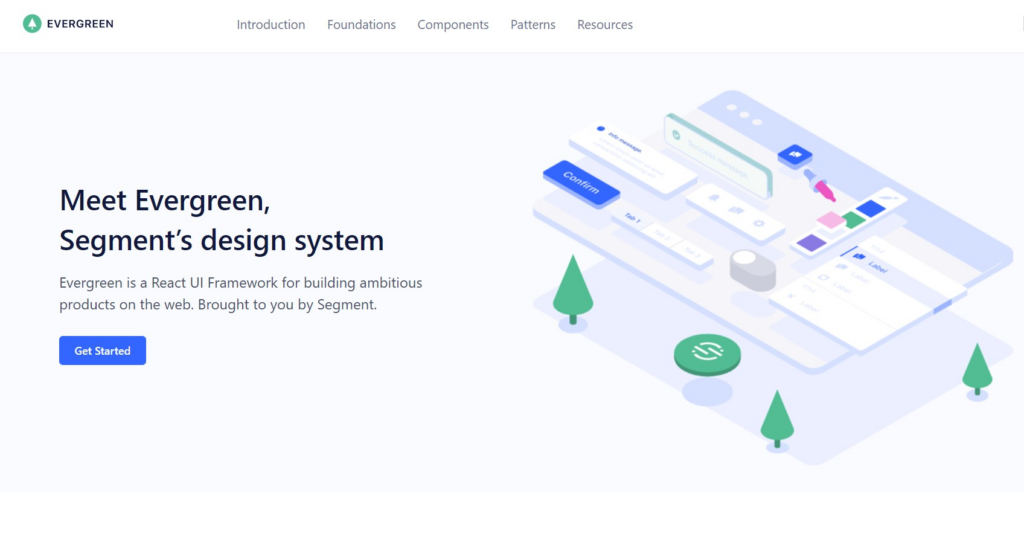
Evergreen for React
This tool comes with polished React components and is open source and free to use. It provides an alternative more- refined way to develop beautiful React UIs where aesthetics is a priority. You can access its documentation from the creator’s website and learn more about how you can use it on your projects.
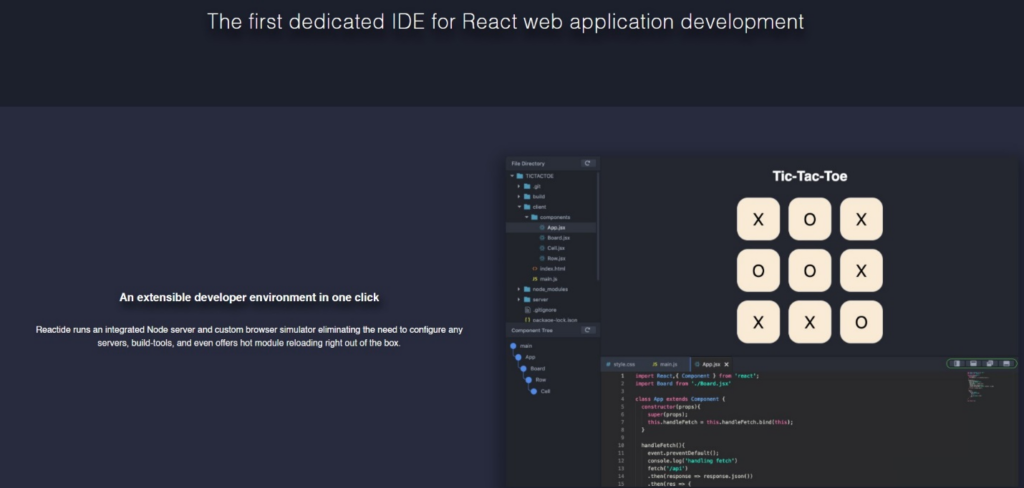
Reactide For React
Reactide is a full standalone IDE for ReactJS that has grown in popularity in recent years. It’s lightweight, cross-platform (iOS, Windows, Linux), simple, and made for web developers especially those who use React.
It comes with a custom browser simulator, node.js server, visual editing support, code suggestions, code completion, component visualization, and much more.
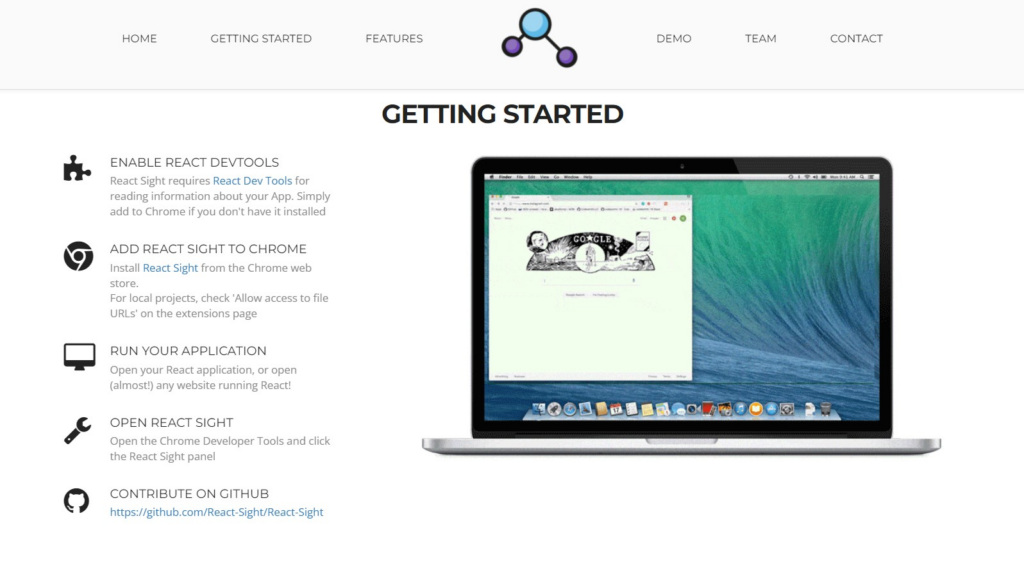
React Sight
Many developers appreciate the ability to visualize their app in a flowchart and this is exactly what you get with React Sight.
With this tool, you will be able to break down complex app structures into an easy-to-digest hierarchical flowchart in a few clicks.
Just hover over nodes and it provides you with useful links to related components and your component tree or component hierarchy.
Rekit
Rekit is one of the best testing tools for React projects and its wide userbase is a testament to that fact.
Rekit is scalable, feature-oriented, and uses a one-action pattern. You can use Rekit to test your React apps as well as other non-React apps coded in Node, Angular, Typescript, Vue, and even Babel. It’s all you could ever need for React testing.
React Cosmos
Any developer who has interacted with React knows that reusable components are pretty much at the DNA of the library. React Cosmos allows you to create, manage and keep track of reusable components in complex projects. It has a rich component library, uses an open platform, and is great for debugging components.
React is a rich language with millions of developers behind it. There are probably thousands of tools and plugins out there you can download and use for very specific tasks; don’t be afraid to explore. Building a React interface and not sure where to start? Why not hire a react developer today and see your ideas come to life?
There is a surging demand for dependable software applications and programs in the current connected digital realm. More than 70% of consumers in the business industry, for example, say receiving customer support and product details through their smart gadgets is crucial.
Besides connecting with customers directly, players in the business sector are learning that the Salesforce custom app can extend hardware and software efficiency through custom mobile or web application development. Are you considering building apps tutorials in Salesforce? This article will offer the guidance you need to succeed in the process.
What is a Custom App in Salesforce?
A custom application is a collection of objects or tabs that work together to solve a specific business need. Entrepreneurs or third-party developers can create apps distributed securely and privately to clients. There are various reasons why you should choose a Salesforce application instead of purchasing one on AppExchange, as we shall see below.
Cost-Effectiveness
Building a JavaScript-based custom app on Salesforce is ideal if you are on a strict budget. Many AppExchange apps attract monthly subscription fees, and the number of users determines the total amount. However, when it comes to custom application development, you only make a one-off payment to cover the development, analysis, and deployment. The number of potential application users does not determine the total amount of money you make.
Custom Apps Cover Complex and Distinct Business Processes
Creating a custom application to accommodate all your business needs is ideal. It allows you to illustrate industry-specific procedures in your Salesforce CRM solution, such as various financial and insurance claims management institutions. AppExchange apps, on the other hand, facilitate the inclusion of universal functionality.
Merging Niche Software Products with Salesforce
You may require a custom integration application to execute a particular integration, such as linking your online platform to the Salesforce trailhead solution to create marketing components and access them from Salesforce. AppExchange has various ready-to-use integration applications to connect your Salesforce solution to extensively used third-party structures such as Microsoft Outlook or SharePoint DMS.
Customizing an App Further
Choosing a custom salesforce app allows you the freedom to modify your app in the future for various reasons, like business process changes or an increase in the number of users. AppExchange app offers no modification guarantee.
Are you looking for a specially designed, cost-effective, and highly customizable app for your business? Acquiring it via custom Salesforce app development would be the right choice. To invest wisely and gain value, consider the complexity of your business process and specific industry roles the app will execute.
How do I create a Custom App in Salesforce?
Before your development team starts building a custom app, they should be conversant with the optional requirements for your users. Here are some steps they should follow.
Establish Your Ideal User
Who is your target audience? Building individual personas helps you determine who your users will be, how often they will interact with the app, and the features they will need. With this information at hand, you can develop comprehensive profiles of your users and understand their preferred Salesforce admin functions.
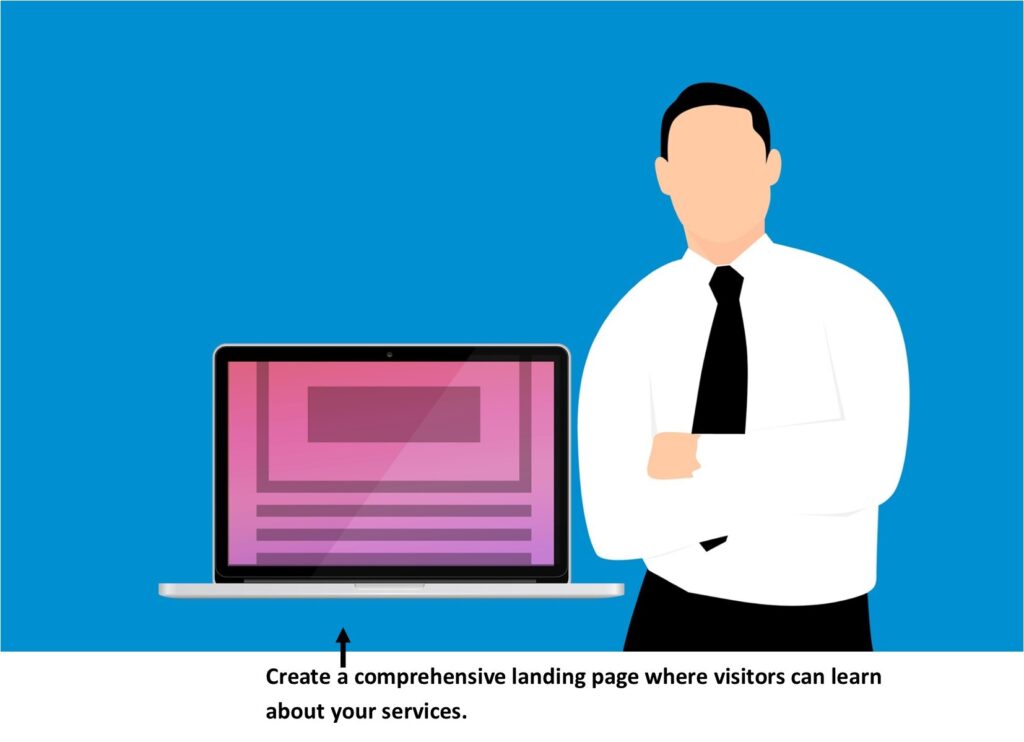
Leverage Your Ideas to Create a Prototype
Build an interdependent prototype for testing purposes. RAD (rapid application development) checkbox methodology is an ideal method of giving users quick and consistent and quick feedback over continued planning while allowing you to make the necessary changes. Be sure to test new features and certify user experience before embarking on the next launch stage.
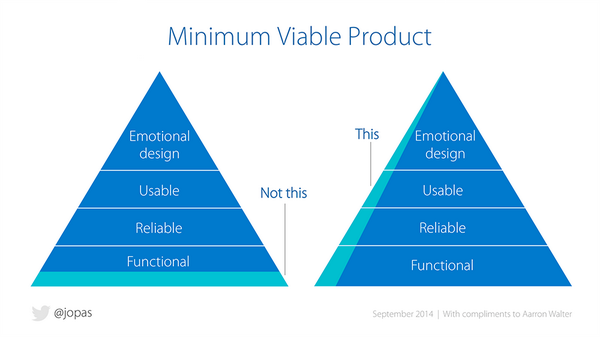
Develop an MVP (Minimum Viable Product)
Before launching the MVP, release it to your users for testing. Doing so helps you get feedback from real-world applications. By giving your users advanced updates with new compatible technologies, continuous delivery, and encryption to protect their data, you’ll remain compliant and keen on personal privacy.
Ensure Your Application Stands out
You can have the latest features and updates, but users will move to your competitors if your application has nothing unique. Ensure users can access the latest features and updates regardless of their operating system, and monitor sign-in functionalities to eliminate bugs and speed up the QA (Quality Assurance) process.
Choose Between Mobile and Web Application
One of the popular misconceptions today is that web and mobile apps can be interchanged. Knowing the type of application, you’re building will help you determine the design, UX, app development software you will use, and the deployment.
Mobile applications are restricted to mobile devices. However, they can access internal resources such as photos, GPS, and contacts. They are also faster and can operate offline. Web applications, on the other hand, work as any browser.
Users don’t have to download or install them on their computers. They can also function on your mobile device with ease. While mobile and web apps can be custom applications, you need to determine your target audience’s preference.
Designing the Salesforce Custom App Architecture
Designing the architecture for a custom app in Salesforce requires careful planning and consideration of various factors. A well-designed architecture sets the foundation for a scalable, maintainable, and efficient application. Here are some key aspects to consider when designing the Salesforce custom app architecture:
Define the App’s Purpose: Start by clearly defining the purpose and objectives of your custom app. Understand the specific requirements, functionality, and user experience goals. This clarity will guide your architectural decisions throughout the design process.
Identify Data Model and Objects: Identify the data model required to support your app. Define the custom objects, fields, and relationships necessary to store and manipulate data effectively. Consider the relationship between your app’s data and standard Salesforce objects to ensure a seamless integration.
Choose Appropriate Development Approach: Salesforce provides several development approaches, including declarative development (point-and-click configuration) and programmatic development (coding with Apex and Visualforce). Evaluate the complexity and requirements of your custom app to determine the most suitable approach. In many cases, a combination of declarative and programmatic development provides the best outcome.
Define Security and Access Controls: Determine the security and access requirements for your custom app. Identify the roles and profiles that need access to specific data and functionality. Leverage Salesforce’s security features such as object-level and field-level security, sharing rules, and permission sets to enforce data security and access controls.
Consider Scalability and Performance: Design your app architecture with scalability and performance in mind. Consider factors such as data volume, user load, and integration with external systems. Utilize Salesforce’s platform features like asynchronous processing, batch processing, and platform caches to optimize performance and handle large data volumes.
Plan Integration Points: Determine if your custom app needs to integrate with external systems or other Salesforce apps. Identify the integration points and select the appropriate integration methods, such as REST or SOAP APIs, Apex callouts, or Salesforce Connect. Ensure data synchronization, error handling, and security considerations are accounted for in the integration design.
Implement Error Handling and Logging: Build robust error handling and logging mechanisms into your app architecture. Define how errors will be captured, logged, and presented to users or administrators. Utilize Salesforce’s logging facilities, such as debug logs and custom logging frameworks, to assist with troubleshooting and maintenance.
Consider User Experience: Design an intuitive and user-friendly interface for your custom app. Leverage Salesforce’s Lightning framework and components to create a modern and responsive user experience. Consider usability best practices, such as consistent layouts, clear navigation, and contextual help, to enhance user adoption and satisfaction.
Plan for Testing and Quality Assurance: Develop a comprehensive testing strategy for your custom app. Define test scenarios, test data, and test cases to ensure the functionality and performance meet requirements. Leverage Salesforce’s testing frameworks, such as Apex unit tests and Lightning component testing, to automate testing and ensure code quality.
Implement Continuous Integration and Deployment: Establish a robust deployment process for your custom app. Leverage Salesforce’s source-driven development model and version control systems to enable continuous integration and deployment practices. Automate the build, test, and deployment processes to ensure reliable and consistent deployments.
Determine the Cost of Custom Application Development
Many factors can determine the cost of your application based on your final goal. These include development, testing, maintenance, functionality, and updating to advanced features for all operating systems.
Price points depend on various elements. Ensuring you have everything that users require is critical. Still, you don’t have to break the bank to have a user-friendly and functional application. Salesforce allows you to develop custom applications with prebuilt templates embed dashboards. And fast deployment.
Building Salesforce Custom app
There are two types of Salesforce applications; Lightning and Classic. Lightning apps are built and managed in Lightning experience, while classic apps are developed and managed in Salesforce Classic. Developers can customize both types of applications to align with users’ needs. Classic applications are a collection of primary and custom tabs such as:
Standard objects like Home, Groups, the core Chatter feed, and People
Visualforce tabs
Custom objects
Lightning component tabs
Web tabs
Canvas applications through visual force tabs
Lightning apps are a group of components that comprise the Classic applications list, Lightning page tabs, and the Sales Dialer. In Lightning apps, users can customize the application’s logo and the navigation bar color to improve its branding. You can also convert Classic apps to Lightning applications in Lightning Experience. However, you must manage the two app versions separately in different environments.
Salesforce offers standard applications like Sales and Service. You can build your on-demand application by placing components into new custom apps.
A custom application comprises a description, label, app name, and a list of items that usually includes tabs. You can also incorporate custom branding and logos on your custom apps.
Custom apps in Salesforce classic are listed under the Lighting Platform app menu. It is a dropdown list that appears at the top of each page. In the Salesforce mobile app and Lighting experience, you can get your available custom apps in the App Launcher. To view your available Salesforce apps in Lightning Experience, click View All.
Once you select an app, your screen will change to display the contents of the application. For example, suppose you move from one app that comprises Opportunities to another one that does not. The Opportunities component will disappear. Further, the application may reflect a different landing tab. Apps are linked with profiles, while profiles regulate the tabs you can view and hide the available applications.
Testing and Quality Assurance of the Salesforce Custom App
Testing and Quality Assurance (QA) play a crucial role in ensuring the reliability, functionality, and overall quality of a Salesforce custom app. By conducting thorough testing and implementing effective QA processes, you can identify and address any issues or defects before the app is deployed to production. Here are some key aspects to consider when testing and performing QA on a Salesforce custom app:
Requirements Analysis: Begin by thoroughly understanding the requirements of the custom app. This will help you define the scope of testing and ensure that all functional and non-functional requirements are met.
Test Planning: Develop a comprehensive test plan that outlines the testing approach, test objectives, test cases, and resources required. The plan should cover different types of testing, such as functional, integration, performance, security, and user acceptance testing (UAT).
Functional Testing: This type of testing ensures that the app functions as intended. Test all the features and functionalities of the custom app, verifying that it meets the specified requirements. Include positive and negative test cases to cover different scenarios.
Integration Testing: Validate the app’s integration with other systems and third-party applications. Test data synchronization, APIs, and any integrations with Salesforce’s standard features or external systems. Ensure that the custom app seamlessly interacts with other components of the Salesforce ecosystem.
Performance Testing: Evaluate the app’s performance under different loads and stress conditions. Measure response times, resource utilization, scalability, and stability to ensure the app can handle expected user volumes without performance degradation.
Security Testing: Verify the app’s security measures to protect sensitive data. Test for vulnerabilities, such as SQL injection, cross-site scripting (XSS), and insecure authentication/authorization. Ensure that access controls, data encryption, and user permissions are implemented correctly.
User Acceptance Testing (UAT): Involve end users or stakeholders in UAT to ensure the app meets their expectations. Gather feedback and address any usability issues. UAT helps validate that the custom app fulfills the business requirements and delivers the desired user experience.
Regression Testing: After making changes or fixing defects, perform regression testing to ensure that existing functionality remains unaffected. Test all previously tested features to detect any regressions or unintended side effects.
Automated Testing: Implement automated test scripts using tools like Selenium or Apex test classes. Automated tests improve efficiency, reliability, and repeatability of testing, especially for repetitive tasks and regression testing.
Continuous Monitoring: Establish monitoring mechanisms to track the app’s performance and user experience in real-time. Implement error tracking, logs, and analytics to identify and address any issues that arise post-deployment.
Documentation and Reporting: Maintain comprehensive documentation throughout the testing and QA process. Document test cases, test results, defects, and any recommendations or improvements. Generate regular reports to provide visibility into the quality assurance activities and outcomes.
How do I publish a Salesforce app?
Before publishing the application, you must finish off the safety review procedure. The process doesn’t end after passing the initial safety audit. You should follow security review guidelines at each development stage. Further, Salesforce demands regular safety analysis between six and two years after approval. Safety risks evolve every day, and you must conduct safety checks regularly to be on the safe side.
Every application version must undergo a safety review procedure. Developers should also analyze their products on Salesforce before presenting a safety review. Doing so increases the application’s chances of clearing the review process, explaining why AppExchange has become one of the most popular commercial app marketplaces.
Publishing Salesforce Custom All on AppExchange
Link the packaging org to AppExchange
Set provider profile or information
Create listings for components or applications
Submit components or applications for safety review
Publish your list on AppExchange
Listing helps users determine how they can benefit from your component or app.
Here are things you need when creating a listing
Description of your product
Contact data
Price
Email notification management
Free test drive or trial information
Select license settings
Listing categories
Select installation options
Set app payments
What are some examples of Custom Apps in Salesforce?
Whether you are a serial entrepreneur or a startup founder, creating a custom app on Salesforce can help boost your business. You can easily create your app on AppExchange and integrate it into the Salesforce platform. Salesforce is a fast-growing SaaS-oriented CRM with numerous apps on AppExchange.
To create an app, you should know that you can base on various essential categories like administration and IT, sales, marketing, and customer service. Devising new ideas can be a daunting task. Here are some ideas you can leverage to develop custom Salesforce apps.
Administration and IT apps
Some of the applications that fall under this category include:
Automation Apps
Developing an automation app to execute routine and repetitive tasks is an organization’s best effort and time-saving solution. The app automates all redundant functions in the workflow, copying and transferring data for the users.
You can incorporate support for including popularly used web applications like Gravity forms, Google Sheets, Gmail, Evernote, Wuffoo, and Mailchimp. Users can link Salesforce to the web applications regularly and automate everyday tasks.Recovery and Data Backup App
Companies managing a cloud-based customer relations management system want to protect their data at all costs. The Salesforce service level agreement does not cover data loss from malicious intent or user error. The official Salesforce system administrator help page recommends using AppExchange backup options.
A recovery and data backup app can be ideal in recovering, comparing, and replacing the Sales force.com user data. It can also facilitate daily automatic backups. Ensuring the app can restore metadata and data at all levels will be an added advantage. Further, your application should replicate dev orgs for anonymous data development, testing, user acceptance testing, and quality assurance.
Marketing Apps
Examples of marketing apps would be:
Mass Email and Email Marketing App
An email marketing application syncs contacts and data on the Salesforce platform with your application for targeted and smooth email marketing. It can update customers’ preferences by regulating subscriber opt-out automatically. Here are some features of an ideal marketing app.
Regulating email opt-out and opt-in settings
Regulating information and data storage on Salesforce
Leveraging steps to unsubscribe and subscribe leads and contacts from lists automatically
Checking and tracking email statistics directly in Salesforce
Sales Apps
Some of the best apps under this category would be:
Routing and Lead Assignment Applications
An accurate and fast lead assignment is crucial for boosting a company’s conversion rates. You can get the most from your valuable leads by allocating them to suitable representatives. Developing an application that can automate territory and lead assignment for sales models can give you a good head start.
You can apply Load Balancing and Round Robin design in the application to ensure users distribute leads efficiently and fairly. Account-oriented marketing is a critical feature that you can incorporate in a sales application to match the leads of existing contacts or accounts depending on the company’s email domain, name, and location.
A skill and geo-oriented routine feature can be incorporated in the ideal application’s environment, allowing it to forward leads to the team members with the appropriate set of area codes and language skills.
E-Signature and Document Generation App
A document generation application can be crucial for users who want to keep their documents and files within the Salesforce service cloud. Using a dedicated api app for creating documents, you can safely automate document creation and delivery on the platform.
Users can create and share documents such as statements, invoices, quotes, reports, contracts, and account summaries conveniently. You can also include support for e-signature allowing companies to ensure customers sign e-docs and forms electronically. Here are some features that will improve the capabilities of the document generation application.
Support for custom and standard object
Chatter and Salesforce1 integrations
Mark and click template editor
Lighting and Classic capability
Collaboration Application
Here is an example of an app that fall under this category.
Project Management App
A customizable project management app that monitors the status of milestones, projects, programs, reports, and tasks can be essential for an organization’s CRM. It simplifies task and project management and eliminates repetitive manual procedures.
Users can generate a template for different project types and later import the templates to facilitate project creation in Salesforce. You can include various features like project calendars, Gantt charts, and milestone and task scheduling to monitor projects.
Human Resource App
Recruitment App
A recruitment tool plays a huge role in helping hiring managers in an organization. It allows them to monitor their firm’s job postings on various hiring websites and analyze job applications. It also functions as a platform that tracks available jobs, job seekers’ preferences, work experience, and reviews from previous interviewers under one location.
A recruitment app also analyzes potential candidates’ demographics to establish their recruitment patterns. Monitoring job applicants in an organization and setting their current status is easier with a recruitment tool.
Customer Service App
Telephonic App
A telephonic Salesforce custom app allows organizations to smoothly link their CRM with cloud-oriented business communications. Call center agents and sales teams can make outbound and inbound calls directly from the Salesforce dashboard with the click-to-dial on contacts, leads, or account records.
The application’s integration with the Salesforce CRN can give users various features like real-time analytics, call scheduling, and call logging. When call agents receive incoming calls, they can view the caller’s account details. The application enhances customer retention and communication, call efficiency, and workforce productivity.
Finance App
Expense and Time App
A simple cloud-oriented time tracker for contractors and employees can be ideal for businesses. It allows them to maintain well-organized data for billing, expense tracking, and payroll purposes. A time tracker can track payroll and billable time simultaneously and seamlessly.
Employees, too, can track their time from any mobile gadget or computer. Further, they can monitor their expenses and directly upload receipts from their mobile devices. The recorded information can be exported to Spreadsheets, Quickbooks, or any other accounting platform they use.
Analytics App
Data Management App
A data management tool can encourage the workforce to be productive while boosting growth in an organization by regulating their Salesforce data under one centralized place. Users can assess and update their dashboards with a customizable and straightforward grid interface.
You can include mass updates, multiple tab grids, inline editing, conditional formatting, seamless interpretation of data, and push behaviors. Clean data handling enhances insights, pipeline management, and efficiency through analytics.
This list of ideas and examples of Salesforce applications from various categories, and by collaborating with an authentic Salesforce consulting firm, you can kickstart your app development project.
10 Things to Consider When Building a Salesforce Custom App
Before you start developing a Salesforce custom app, there are various factors to consider. These factors will facilitate the successful implementation of your app. They include:
1. Infrastructure
Determining your goals and maintaining open-mindedness towards achieving them is crucial for developing a custom application. For instance, you may have to modify existing business processes to get the preferred results. In that case, you should compare the benefits you will get from the custom app and the disruption the changes may trigger on your business.
Complexity is also a crucial factor to consider. If designing and implementing a process becomes complex, consider using a different tool and merging it with Salesforce to get your desired results. While Salesforce can be an overly robust tool, some things function better away from the platform. Add the reporting essentials from the preliminary design phases. Those will then determine the design decisions you will make later, such as object relationships and field data types. Considering reporting essentials as a second thought and adding them later in the development process makes it complex.
2. Determine Pre-Existing Solutions
Consider assessing your current Salesforce configuration and potential AppExchange solutions during the design stage. Ask yourself, are there existing objects or apps that I can use to reduce customization? Are there Visualforce or Apex scripts connected to these objects? Consider the complexity of code changes and updates.
Establish the availability of pre-existing AppExchange application that executes a similar task and check for pre-existing Lighting Components to boost your Lighting app.
3. Consider Searchability, Security, and Visibility
Data safety is one of the most critical factors to consider when designing your app’s data model. Custom app development requires keen consideration of CRUD (consideration of object-level security, record-level security, and FLS ( field-level security). These components become critical when external users use the application via a community.
Master-detail relationships demand that all users who can view master records access detailed data. Lookup relationships enable more control over the clarity of related records. Developers should test user-oriented access before transferring the custom application to production.
Incorporate profile-based assessment of dashboards and reports because they can show varying user results based on the object, field, and record-level safety. Include tabs for things that require searchability even when you don’t want to incorporate the tab in the application’s navigation. Remember, only custom objects with individual tabs are added in search results.
4. Ensure Your App will Align well with Others
Any changes on custom applications could have a considerable impact, especially when adding standard objects and integrating them with other business systems. When remodeling standard objects, use the existing field whenever possible. You can include picklist values to picklist sections and allocate them to a defined record type.
Avoid including field help or other field-standard features on standard objects. For instance, converting an existing field to required can break Apex test classes. Consider converting it on the page layout for the best results. Suppose the application leverages standard objects like Contacts and Accounts.
In that case, you may want to generate new record layouts and types to differentiate new types of Contacts and Accounts relevant to your application. You may want to update existing reports to include filters depending on record type. Analyze existing validation rules, triggers, workflows, and processes on re-modeled objects. You may have to integrate the record type with a conditioning base.
Always adhere to your company’s naming conventions and styles. For integrations, determine whether you should store data from an external system in Salesforce or it should be queried asked in real-time. For example, you can leverage Salesforce Connect to acquire actual-time data from exterior components and report on the same without keeping data in Salesforce.
5. Avoid Contaminated Data
Salesforce gives application designers various methods of enforcing data integrity. Leveraging them will facilitate the adoption of your application. Here are some tips on how to go about it.
Workflow field updates, default values, and validation rules updates can enhance an application’s usability while making the app more actionable and clean.
Utilize unique External ID fields when merging with external systems
Duplicate and matching rules can prevent duplicate information
6. Consider User Experience
Suppose accessibility from Salesforce1 is necessary, incorporate quick actions and customized compact layouts to improve the user experience and increase adoption.
7. Maintain Simplicity
Don’t overwhelm your app with numerous features. Doing so can be time-consuming, and maintaining it can be overly complex.
8. Have a Futuristic Plan
When developing an application, ensure that it caters to a niche that users will use to solve their problems. You need to know your target audience, goals, and how the app will scale. Document the product strategy, product development cycle, user experience, and the application’s requirements. Doing so will give you a prototype of the app before you can start building it. To create a compelling application, you should understand how the Salesforce customer relations management system operates. Doing so helps you know how to integrate it in Salesforce.
9. Have a Cloud Storage
Your Custom Salesforce application development process should be cost-effective, easy to maintain, flexible, and fast launching. Developing your app on force.com allows you to leverage cloud storage.
10. Use Agile Methodology in Application Development
When you acquire the application’s prototype, you have to keep up with evolving demands in business. You can do so through an agile development concept and consider all improvements and iterations during the process. Doing so allows you to make continuous custom apps to facilitate improvements in your application.
Finally
Offering your client a Salesforce custom application allows them to enjoy more value from the app and your solution. Besides, it can make users more productive while instilling efficiency in their business procedures.
To create an effective app for your customers, you need to consider the various things discussed in this article. Use it to gain more insights on developing an app on Salesforce. You don’t have to be a professional developer to build an app. Hire a developer now, and they will help you create an effective app for your organization.
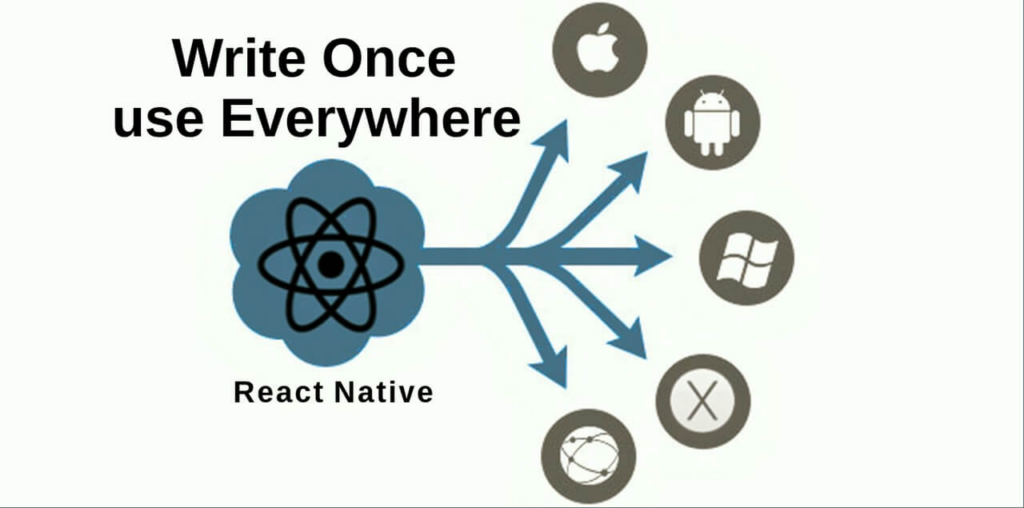
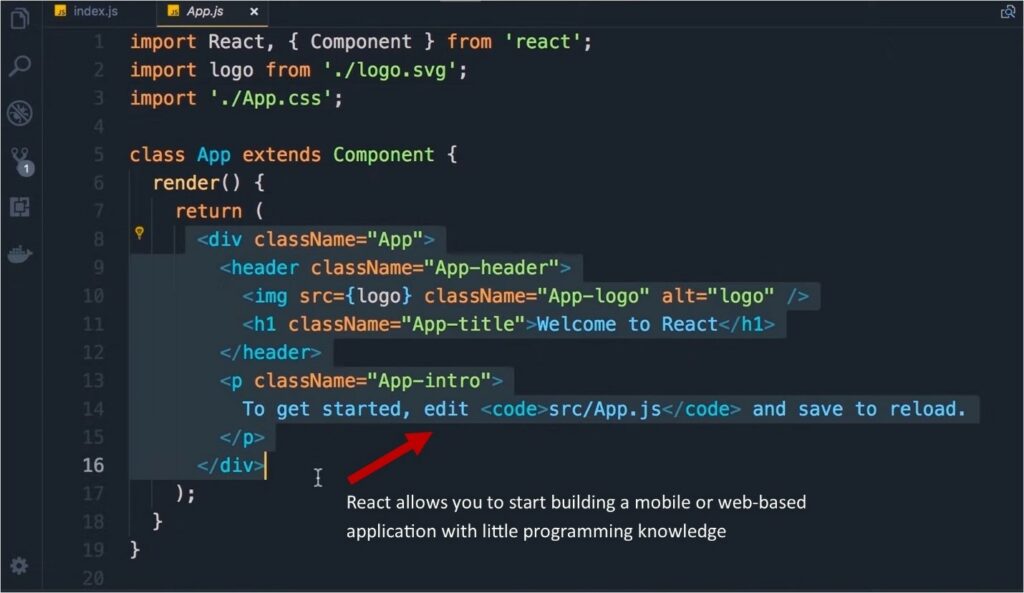
React is a JavaScript library used in the development of user interfaces for mobile and web applications. It includes small and reusable bits of code known as components. The components conveniently integrate with other libraries and JavaScript components.
ReactJS is a popular open-source web technology platform that developers use to build single web page applications. Among the reasons for its popularity is the large selection of React component libraries. These component libraries save React developers time and effort when building modern React applications.
React libraries have pre-built components such as form input, pagination, menu, buttons, icon sets, time, and date picker. Developers can build modern web designs and stunning user interfaces for web, mobile, desktop, and hybrid apps by leveraging React component libraries.
React component libraries optimize the UI and web development process by providing high degrees of flexibility due to their extensive modularity.
Should I Use a React Component Library?
A component library is handy, especially if you want to quickly develop UI kits and apps. But some developers argue the case of designing and building their own components as part of an enterprise design system. However, the resources and time required to build components from scratch outweigh any long-term gain. Instead, developers optimize development across multiple platforms using a React UI component library.
A component library can mitigate the risk of variations between products or having different components in different places. They manage the source code for user interface elements and leverage JavaScript and CSS.
Here are the benefits of using a React component library:
-Accessibility: A component library contains ready-made and reusable components that offer quick access to designers and developers everywhere. The library improves communication and collaboration between designers and developers working across teams.
-Reduced Code Duplication: Codes can easily get duplicated across multiple designs and projects. But there is no need to convert the design to code with a component library. You can apply the code component to the design without further development.
-Consistency: A component library makes it easier to maintain a single source of truth. It is easier to achieve uniformity by enabling consistent UX and UI across the entire project. In addition, it is more advantageous when different designers are working across various designs.
-Speed: Development teams can save time by avoiding building components from the bottom up. Instead of creating or redesigning UI components, React libraries provide them ready to use. Thanks to the pre-set and ready-made components, teams can also avoid time-draining decision-making processes.
-Compatibility: Front-end developers can find it challenging to ensure cross-device and cross-browser compatibility. Component libraries play a significant role in guaranteeing compatibility through standardization.
Criteria for Choosing a React Components Library
React is a popular JavaScript library used for building user interfaces. To make the development process faster and more efficient, developers often use React components libraries. These libraries provide pre-built components that can be easily integrated into the project, saving time and effort. Choosing the right components library can be a daunting task as there are numerous options available. In this article, we will discuss some criteria that can help you choose the best React components library for your project.
Functionality
The first and foremost criteria for selecting a React components library is its functionality. The library should have all the components that are required for your project. It should also offer customization options so that you can modify the components to suit your needs.
Documentation
The components library should have clear and detailed documentation. This will help you understand how to use the components and customize them. Good documentation will also save you time and effort in the long run.
Community support
A vibrant community is a sign of a healthy and active library. It means that the library is being regularly updated and maintained. It also means that you can get help from the community if you run into any issues or have any questions.
Performance
The components library should be optimized for performance. It should not slow down the app or affect its performance negatively. The library should also be lightweight and not add unnecessary bloat to the project.
Accessibility
Accessibility is an important consideration for any web application. The components library should be accessible to all users, including those with disabilities. It should follow accessibility guidelines and have features like keyboard navigation, aria attributes, and color contrast.
License
The components library should have a compatible license that suits your project’s requirements. Some libraries have restrictive licenses that may not be suitable for commercial projects. It is important to check the license before using the library.
Integration
The components library should integrate well with other libraries and frameworks that you are using. It should not cause conflicts or compatibility issues with other parts of your application.
Customizability
The components library should offer customization options. This will allow you to modify the components to suit your project’s specific needs. It should also allow you to add your own styles and branding to the components.
In conclusion, choosing the right React components library requires careful consideration of various factors. By using the criteria outlined above, you can find a library that meets your project’s requirements and helps you build great user interfaces more efficiently.
Is React a UI Framework?
React is not a UI framework but an open-source Javascript library for developing user interfaces of UI components. Facebook and a community of developers maintain this open-source library.
React.js is a popular front-end framework and has over 172,000 stars on GitHub. There is a wide range of growing support libraries that assist developers in customizing UI components effectively.
What are the Libraries Used in React?
The Reactjs ecosystem contains several libraries that optimize the workflow of any web and mobile app development process. These libraries include:
-Routing and Navigation in ReactJS: Web apps need to navigate users between pages. However, it is tedious to reload entire pages while navigating between sections in Single Page Applications (SPA). Instead, SPAs render part of the UI for interaction with the user. They follow a dynamic routing model that fetches new data every time a user interacts with the app.
-React CLIs and Boilerplates: These are reusable code blocks that enable developers to configure multiple libraries at once. They create identical copies that React developers can reuse later for different projects.
-React UI Component Libraries: These components make the user interface engaging and interactive, ensuring users return to the app.
-Animation Libraries: React provides an easy-to-use declarative user interface known as React Transition Group, enabling developers to use animations when building web and mobile apps.
-Form Libraries: Form React UI libraries provide a quick and better way of creating customized components such as inputs, buttons, selects, and potentially new components. These libraries prevent developers from building form elements from scratch.
-State Management: These libraries are essential in keeping the state of users intact across various web forms.
-Payments: Payment SDKs are available in React Ecosystem, and they facilitate acceptable in-app payments with various payment options. They provide a reliable and secure way for end-users to pay.
-Augment Reality (AR) and Virtual Reality (VR): AR blends real-world reality with digital or virtual ones to create an enhanced version of reality. It enables overlaying is digital and virtual information in a real-world scenario.
What is an example of a React Library?
Many developers use React Libraries to create projects and build various web and mobile apps. Here are a few examples:
-Calculator: Implementation of the iOS and Android calculator built in React js.
-Emoji Search: React app built for searching various emojis.
-SnapShot: A photo gallery designed and built with React featuring a search option.
-BMI Calculator: A React Hooks app used in calculating body mass index.
-Image Compressor: This is an offline image compressor developed with browser image compression and React.
-Counter App: This is an example of a small shopping cart.
-Tutorial Solution: This app offers solutions to challenges outlined at the end of a Reactjs tutorial.
-Builder Book: This is a complete open-source web app that allows users to host and write docs or sell books. It is built with React, MongoDB, Material-UI, Mongoose, Next, and Express.
What is the Best Components Library for React in 2023?
Selecting a suitable React component library for an app can be tricky, especially if you are new to ReactJS. But don’t worry, we have compiled a list of the 20 best React component libraries in 2023.
1. React Bootstrap
React Bootstrap is popular among developers because it gives them the liberty to play with adaptive web components. It is one of the best React libraries with more than 19,300 stars and 3,100 forks on GitHub and completely replaces bootstrap JavaScript with React.
It also provides numerous templates and bootstrap themes for developers to choose from. These templates feature a modern design and are easy to customize.
The components are built like React components, which means that unwanted libraries like jQuery are not present. It is also one of the oldest libraries, but it has evolved a lot. React Bootstrap is an excellent choice for an app’s UI base. However, unwanted libraries tend to limit the efficiency of web applications.
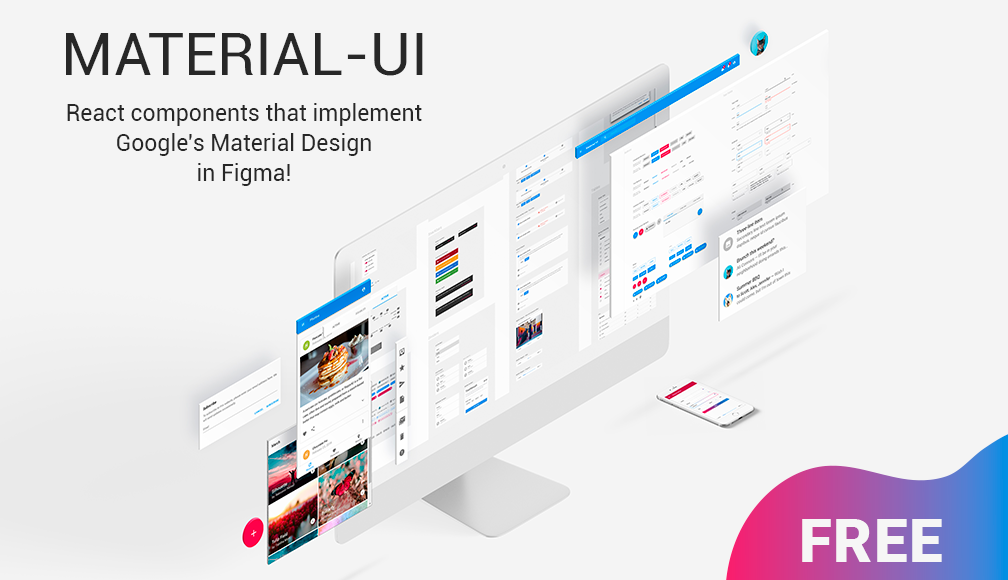
2. Material UI React
This Google’s material design allows React developers to create beautiful and intuitive products. It has a selection of simplistic and sleek elements that awe developers by providing all components necessary for building a high-quality digital experience.
It is among the best React libraries and has all the material design elements that developers can easily use in their React projects. It also provides typography that standardizes CSS components while ensuring browser compatibility.
The library has more than 67,800 stars and 21,600 forks on GitHub. Material UI provides developers with a collection of themes that they can use on their sites. In addition, expensive documentation provides guidance whenever developers feel stuck.
3. Ant Design React
Ant Design React is an excellent React component library containing many quality prototypes and components to develop rich, engaging user interfaces. It has more than 6,200 stars and 27,700 forks on GitHub.
This library supports the internationalization of various design languages and uses Less.js to style components. It also enables customization to alter the designs. The library has multiple components, including icons, buttons, breadcrumbs, dropdowns, grids, and pagination. It has a mobile-friendly version for creating mobile applications.
4. React Router
React Router is famous for its declarative programming model. If you are developing an app using React, it is advantageous to have components that you can create declaratively in your application. React Router has a collection of such components.
This library will enable you to create URLs that you can bookmark or develop a composable way to explore in React native. React Router is among the best libraries for making it easy for developers to manage navigation in single-page apps. It also offers vivid support for nesting, server-side rendering, and screen-to-screen transition.
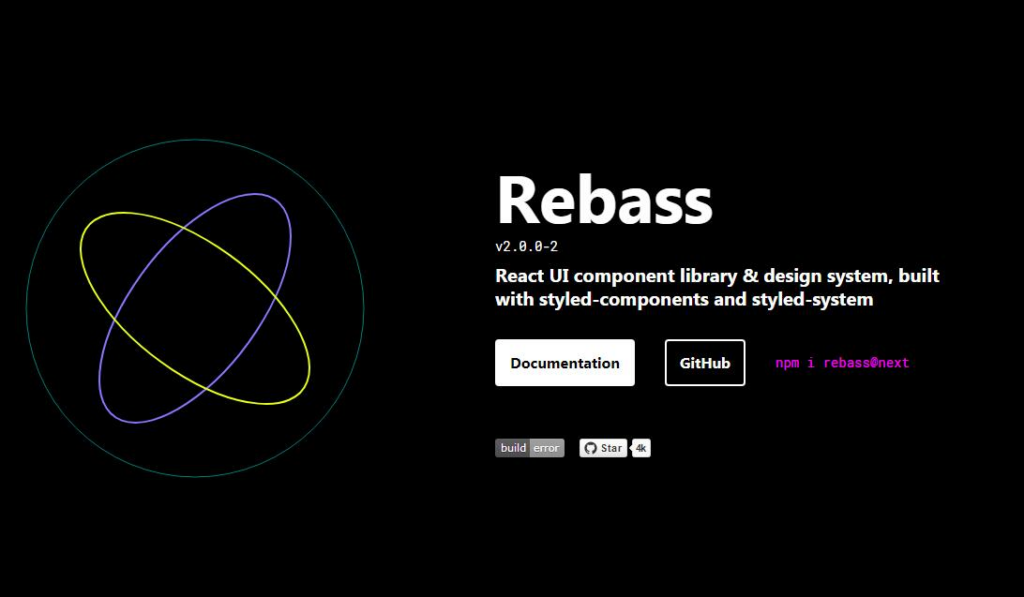
5. Rebass
Web development has progressed from the complex task of customizing HTML and CSS to dynamic components where styling is auto-generated using libraries. Rebass is among the best grid libraries, offering UI components, allowing developers to focus on-page development. This library has more than 7,300 stars and 580 forks on GitHub.
The library has a theme provider that enables developers to install custom themes that offer a whole new level of user experience. Rebass is easy to adapt to, and developers quickly get used to the syntaxes and codes. It can integrate with other libraries and enhance a web application’s performance.
6. Semantic UI React
Semantic UI React is another excellent component library with over 12,200 stars and 3,600 forks on GitHub. It has a virtual DOM, and since it is unwise to have a library that manipulates DOM, Semantic UI is free from jQuery. Developers can quickly build responsive and stunning web designs with coherent and syntactical code using Semantic UI.
A shortage in customizable elements has led Semantic UI to unleash its uninterruptable creativity. However, the library may be complex if you don’t have hands-on experience with JavaScript.
7. React Motion
React Motion provides an easy and fast solution for animating UI components in React.js. The library helps React developers in creating realistic animations.
All you have to do is define the parameters for dampness and stiffness in any component that you have exported. React Motion will create numerous animations for you to choose from. In addition, you don’t have to worry about interruptions. The API is simplified to a significant extent.
The library has more than 19,600 stars and 1,100 forks on GitHub. The documentation is straightforward, and developers can find source codes for each component.
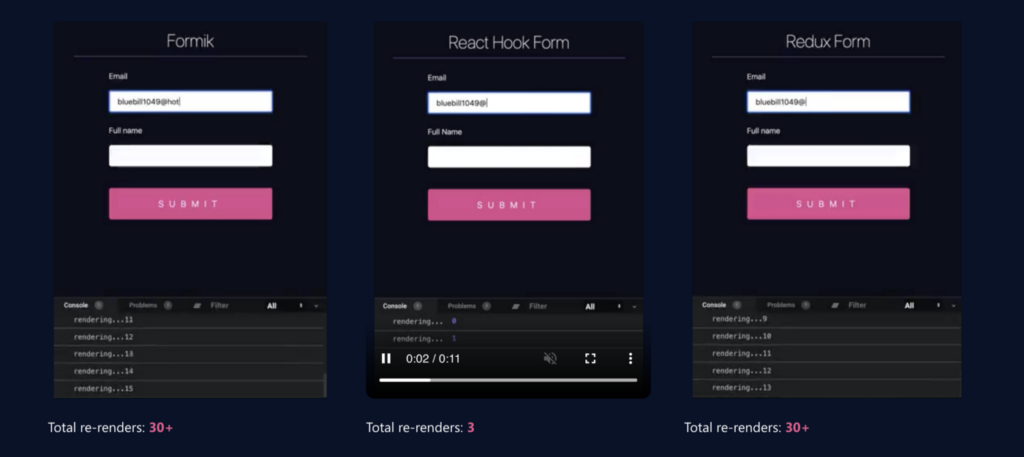
8. React Hook Form
React Hook Form is a popular library with over 20,300 stars on GitHub. Developers use this library with React Hook’s APIs. The library makes form validation easier by aligning current HTML standards with the user interface.
The library carries the uncontrolled set of components and native HTML inputs. Typescript developed the React Hook Form, and it assists developers to build a form data type that supports form values.
Developers use this library in creating error-free forms that significantly reduce rendering time. In addition, developers can integrate and use it with React’s state management libraries.
9. Redux
Redux is one of the best component and state management libraries with 20,900 stars and 3,000 GitHub Forks. Though it is designed to be used with React UI’s library components, developers can use it with Ember, Angular, Vue, and other JS frameworks.
Redux is essential in connecting React components to state pieces by reducing callbacks and props. The library helps create environment-friendly and consistent codes, thus being referred to as a developer’s best friend. React developers can edit the code while the app is live,React-Redux is React Native’s official Redux library.
10. React 360
Most businesses, especially e-commerce and retail, provide argument and virtual reality experiences to test their products virtually. React 360 enables developers to create AR/VR and 360 experiences.
Using this library, whatever React developers create runs smoothly on desktop, mobile, and VR devices. The aim of React 360 is to simplify the process of building complex VR and 3D UI. The library boasts of using familiar tools and concepts in providing engaging users experiences.
You will need to have NodeJS and npm before installing React 360 on your machine.
11. FABRICS React
Microsoft developed Fabrics React as one of the best component libraries that provides user experiences similar to MS Office. Microsoft uses the latest frameworks, such as ES6, Webpack, and SASS, to develop components in the library. The components have a simple design, making them easier to use.
React developers can easily integrate Fabrics React’s component with libraries like Redux-form. The components are applicable on various platforms, including desktop, laptop, mobile, and even Onenote and Office365. Fabrics’ core is a set of CSS classes combined with SASS components, allowing access to various animations and colors.
12. React Virtualized
React Virtualized is one of the best React Grid libraries that targets specific user interface aspects. The library has 21,600 GitHub stars and 2,700 forks. This React library aims at accomplishing a single goal; rendering lists and tables effectively on your page.
Rendering a table with thousands of elements is challenging, and this library aims to tackle this kind of challenge. In addition, it allows web developers to integrate various JavaScript-based usability features with user interfaces. These features include window scrollers, cell measurers, infinite loaders, auto sizers, and arrow critical steppers.
13. React Desktop
React desktop is a JavaScript-based library built on React. The objective of this React library is to provide a web experience similar to using a native desktop application. It supports various macOS and windows components like a nav pane, checkbox, radio buttons, and dialogue boxes. The library has a rating of over 8,000 GitHub stars.
This library is one of the best in creating web apps. JavaScript developers can use UI components from the library to effectively re-create the user interfaces provided by Windows and macOS. React desktop facilitates a streamlined transition from the native desktop app to a web app.
14. Chakra UI
This React component library aims to assist React developers in spending less time in scripting codes and more time developing a UI that will provide great user experiences. It offers simple, accessible, and modular UI components that assist in building applications.
Chakra UI components follow WAI-ARIA standards and are accessible. Developers can customize these components easily to fit their design specifications. In addition, the library also provides dark and light UI themes.
Composition is the main objective of this React component library. Hence, React developers can create new components easily. The Chakra UI community is also active and ready to assist when a developer feels stuck.
15. React Final Form
React Final Form is a subscription-based library designed by modular for state-of-form management. This library assists developers in writing large and complex codes meant to handle hundreds of fields in a form.
But developers should worry about bundle size if they consider performance. React Final Form library occupies only 5.4kb, providing a lean solution to form management. It allows developers to flexibly create form features by offering hooks API.
16. Styled Components
Developers using traditional CSS often face problems when they accidentally overwrite a selector used in another place. Styled Components are essential in organizing projects. React developers can create a reusable component to customize their applications.
Using CSS syntax inside styled-components helps developers to overcome challenges. The library is popular on Coinbase, Reddit, IMDb, and Vimeo.
17. OnsenUI
OnsenUI is suitable for creating cross-browser-compatible mobile applications. It assists in handling device or OS-compatibility issues, which are common in app development.
The library uses HTML5 and JavaScript and integrates with React, Angular, and Vue. Components are styled automatically, and a single source code works on iOS and Android.
18. Enzyme
Enzyme is one of the best React libraries dedicated to testing React apps. This library allows developers to transverse, manipulate, and simulate React components’ output. Developers can consistently achieve the desired results because this functionality testing library is more valuable and straightforward.
Enzyme can mimic DOM and jQuery API, making it more intuitive and flexible. It also offers Shallow Rendering API, allowing developers to test components that they feel are necessary to their requirements. The API prevents the application from overloading by testing multiple components simultaneously.
19. React Admin
React Admin has 12,000 GitHub stars and is one of the best in creating B2B admin apps running on REST API and GraphQL. It allows developers to customize apps and is built with a collection of popular libraries like React Router, Redux, and Material UI.
Though most React developers use the free version, React Admin has an enterprise version. The enterprise version offers professional support and access to particular private module components.
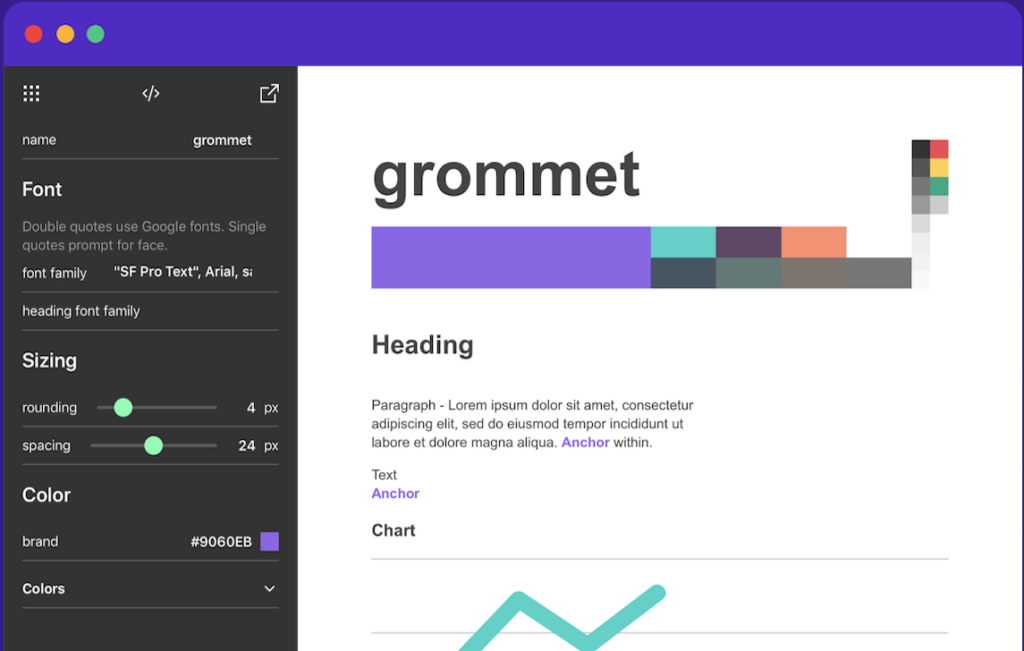
20. Grommet
Grommet boasts of accessible and responsive mobile-first code components. Its components are the library’s building blocks and include layouts, controls, inputs colors, visualization media, and stylesheets. The library has 6,900 GitHub stars.
You can use any of these frameworks to develop web and mobile applications. However, using any React component libraries requires you to be well-versed in JavaScript. However, you can Hire A React Developer to assist you.
Freelancing websites Guru vs Upwork come in handy when you need a project done but don’t want to recruit a full-time employee or plan interviews for suitable personnel.
Freelancing websites are a terrific marketplace where you can discover a large number of specialists to help you with your freelancing work. Guru, Fiverr, Freelancer.com, Upwork, and more freelancing platforms exist, each with its own set of benefits and drawbacks.
Therefore, as a newcomer, you may be puzzled about which platform is best for your needs. In this review, we’ll compare and contrast the two most popular platforms for all kinds of freelancing jobs, Guru and Upwork.com (Elance – ODesk)
With a vast number of freelancers and jobs, Upwork is the most popular freelancing platform. It’s the most effective online marketplace for freelance work. This platform is the most vital online workplace platform since it contains a massive number of companies and job seekers.
Guru.com, on the other hand, is the oldest platform for connecting freelance talent with individuals and businesses, having been started in 1998. It now boasts a global network of over 3 million freelancers who can take on high-quality assignments at low costs.
What Is the Difference Between Guru and Upwork?
Customer Support Reviews
Both Guru and Upwork have a majority of positive customer service evaluations, as well as a few horror stories. In addition, Guru offers freelancers and clients round-the-clock help in the event that they have a problem with the platform.
Upwork also offers customer assistance 24 hours a day, seven days a week; however, consumers are more satisfied with this platform than freelancers.
Job Opportunities
On both platforms, you’ll find a wide range of employment openings. For instance, Guru has plenty of web design, web development and writing jobs available. In addition, this platform includes employment openings for over 100 different skills.
Upwork employs millions of full-time freelancers who rely on the site for a career. However, the majority of them utilize it as a side hustle to supplement their income. As a result, you may find employment opportunities for practically every profession on Upwork. Even large service providers such as Airbnb and Microsoft, advertise their freelance job openings on Upwork.
Platform Fees
The Guru platform offers five membership options, including a free plan with a 9% cost for freelance users. Basic+, Business, Executive, and Pro plans are also available, with job rates ranging from 9% to 5% for freelancers.
The Basic+ plan costs $8.95 per month, the Business plan costs $24.95, the Executive plan costs $39.95 per month, and the Professional plan costs $15.95.
Upwork charges freelancers a sliding-scale fee for their lifetime invoices. For incomes between $0 and $500, Upwork imposes a 20% charge. Upwork charges a 10% fee for incomes between $500 and $10,000 and just a 5% fee for profits beyond $10,000. So, whether the assignments are for an hourly rate, a set price, or a project, Upwork imposes the same fees.
Security
Upwork’s regulations are highly tight, and the company is vigilant in preventing fraudulent behavior and transactions. Upwork’s staff readily identifies scams and bogus profiles on a daily basis due to their regulations. As a result, it assists them in maintaining the integrity of their site while also protecting genuine visitors. As a result, Upwork has become the go-to site for freelancers and employers all across the world due to its well-placed security safeguards.
The dependability of a freelancer on Guru is lower than on Upwork. This is due to the lack of rigorous security checks and validation measures in place. So, you need to be certain if you’re working with a new freelancer who hasn’t worked on the Guru platform before.
Statistics
Below are a few common Guru statistics
1. 800,000 Employers Globally 2. 1 Million issued Invoices 3. 250 Million dollars paid to workers 4. 99% client satisfaction rating
Below are a few common Upwork statistics
1. 2.3 billion dollars earned in 2020. 2. 99% client rating by experts. 3. Ranked world’s number one freelance platform. 4. Up to 50,000 contracts signed per week.
What Are the Pros and Cons of Guru and Upwork?
Benefits of Guru
Easy Recruitment
Guru keeps things easy, even when it comes to hiring freelancers. For instance, if an employer on Guru wants a specialist for a certain project, they simply need to sign the contract, and the job order will be fulfilled automatically. This saves time and effort for all stakeholders involved, resulting in a speedier project completion rate.
Feature Your Projects
You can do digital marketing for your projects on Guru to reach a larger number of experts. As previously stated, this service costs only $29.95 for your position to be displayed at the top of the search results (SEO) for 30 days. This will raise the number of views of your position, drawing the attention of competent experts who will submit their offers.
Forge Long-Term Relationships
Businesses and specialists can develop long-term ties using the site. Guru offers a list of recommended freelancers with a strong track record, so employers won’t have to comb through guru profiles for extended periods. This helps job seekers to save time and meet proven experts with whom they may work on a one-time or long-term project.
Numerous Payment Methods for Accessibility
Many employers already have a preferred payment means. Guru understands this, and as a result, it accepts transactions other than credit cards and electronic payments.
Unlike other platforms, Guru supports checks, e-checks, in-website cash funds, and wire transfers (PayPal, skrill etc.) as forms of payment. This ensures there is payment protection and that the process more user-friendly.
Streamline Your Project Management
Guru’s platform features a simple yet comprehensive dashboard from which you can monitor and manage your tasks. You can interact with the gurus you hired, monitor project progress and status, send data, and even track their time on your dashboard. In addition, the workflow can be simply structured due to the user interface’s ease.
Drawbacks of Guru
Accountability Issues
While making members on your team “specialists” on specific pieces of information is one of Guru’s trendiest features, some users have complained that keeping up with the accountability on unverified data may be tough – notably when their teams are dealing with plenty of information all the time.
Pricing
While the basic package offers a free trial for up to three users, the fixed price rises to $5 per month per user if you add a fourth person.
While this may work for some teams, it does have some limitations. There are, of course, alternative options that cost more per month, per user, and offer more features.
Scammers
Scammers are everywhere on the internet, and it’s difficult to avoid them. Your greatest defense is using your common sense to search for red flags.
Benefits of Upwork
Get Hired Quickly
The majority of UpWork clients are eager to get started right away. If a customer loves your proposal and you have a great phone call, you may be working on a project the next day. This is a significant advantage over more typical recruiting methods, which might require months of planning and paperwork before you can start working on a project.
Get Paid Easily
As an autonomous contractor, sending invoices and taking payments might be hard. Payments are built-in to the system at the click of a button, which is a massive benefit. UpWork makes it easy to integrate your bank account, and funds are instantly wired into your account.
Upwork Pays Better Than Most Freelancer Sites
UpWork has branded itself as a “premium” freelance marketplace. As a result, Upwork clients are more likely to pay higher fees for your services than clients on budget freelance platforms like Fiverr or Freelancer.com.
This implies they’re looking for higher-quality work, clear communication, and meticulous attention to detail. UpWork also features a “U.S. Only” function, allowing customers to advertise jobs only for talent based in the United States. These positions, according to UpWork, pay 75 percent more than other similar posts.
Work from Anywhere
It’s a no-brainer that working remotely is a significant advantage of getting employed on UpWork. Almost every customer is familiar with and comfortable with remote hiring and is acquainted with how it works.
Drawbacks
It’s Hard to Get the First Client
On UpWork, there is plenty of competition, and being hired for your first project might be challenging because of this. For instance, you could apply for over fifty gigs and only secure one after messaging with the client for long.
Hefty Fees
UpWork charges a percentage of your overall billings for each project in addition to the service fee for submitting bids. This percentage ranges from 5% to 20%, depending on your earnings.
Most Clients Have Limited Budgets
Despite this being a “premium” freelance employment site, UpWork clients will have substantially lower budgets than those in your personal network.
That’s understandable; clients using UpWork to find contractors are seeking someone with low overhead expenses rather than consulting a business or hiring an agency.
Which Is a Good Site for Freelancers?
It’s quite difficult to pick a winner because the least-priced isn’t always the best. Other considerations include the availability of customers or freelancers and projects, as well as platform support, security, and simplicity.
Both Guru and Upwork compete for the top spot, which we believe Upwork holds. Upwork charges 10% overall, although that figure has since doubled for small projects. It is certainly a source of concern for small firms, and many individuals are unhappy.
Guru’s total charge per project transaction is 11.45% (2.5% + 8.95%). Guru has emerged as a strong force in pricing, capable of competing with Freelancer.com. and PeoplePerHour.
Tips for Success on Guru and Upwork
Here are some tips for success on Guru and Upwork:
Create a strong profile
Your profile is often the first thing that clients see, so make sure it accurately showcases your skills, experience, and personality. Be sure to include a professional headshot, a compelling headline, and a detailed description of your expertise.
Specialize in a niche
Specializing in a particular niche can help you stand out from the competition and attract clients looking for specific skills or expertise. Consider developing a portfolio or samples of your work in your chosen niche to showcase your abilities.
Be proactive
Don’t wait for clients to come to you – actively search for projects and submit proposals that showcase your strengths and highlight how you can help the client achieve their goals. Use keywords and search filters to find projects that align with your skills and interests.
Communicate clearly and professionally
Communication is key to building strong relationships with clients. Respond to messages and inquiries promptly, and be clear and concise in your communication. Make sure to clarify expectations and deadlines to avoid misunderstandings or miscommunications.
Price competitively
While it’s important to value your time and expertise, pricing yourself out of the market can limit your opportunities. Research industry rates and consider setting your rates competitively based on your experience and the complexity of the project.
Deliver high-quality work
Delivering high-quality work is essential to building a strong reputation on Guru and Upwork. Make sure to adhere to deadlines, deliver work that meets or exceeds the client’s expectations, and be open to feedback and revisions.
Build relationships with clients
Building relationships with clients can lead to repeat business and positive reviews. Follow up with clients after projects are completed, ask for feedback, and offer your services for future projects.
Stay up-to-date with industry trends
Keeping up-to-date with industry trends and best practices can help you stay competitive and offer clients the latest solutions and strategies. Consider taking courses or attending webinars to continue learning and developing your skills.
Final Thought
So that’s it with regard to the most common freelancing platforms (Guru vs Upwork). You’ll find the ideal platform by evaluating all their features based on your needs. Both Guru and Upwork offer the best talents saving you plenty of cash and time. In addition, since both feature millions of users, you can sign up if you just want to get started and become a freelancer.
An integrated development environment is an application that developers use to write their code. There are several Node.js IDEs that you can use as a developer. Depending on your skills as a developer, different IDEs are easier to use for different programming languages.
An IDE has several features that developers need. One of the main features of an IDE is the code editor which is the space on which developers write and edit their code. It also has a debugger that helps you to get rid of errors in your code. It also has a compiler that makes the code you write machine-readable.
There are different types of IDEs that developers can use depending on the programming languages they are using and the type of applications they are developing. There are IDEs for mobile application development, language specific IDEs and multi-language IDEs.
Node JS
One of the popular frameworks used by developers for backend development is Node.js. It is a free JavaScript framework used to develop network and server-side applications and can run on diverse platforms.
To get the best out of Nodejs, you will need to use certain IDEs.
Are you struggling to select the right NodeJS IDEs for your application?
There are many IDEs to choose from when working with Nodejs. As a new developer, you will find it hard to decide on the best IDE to use when working with Nodejs. Even experienced developers sometimes find it hard to choose from the many available IDEs.
Which one is the best and completely free IDE for Nodejs development?
Here is a list of the best and completely free to download IDEs that you can use for Nodejs development.
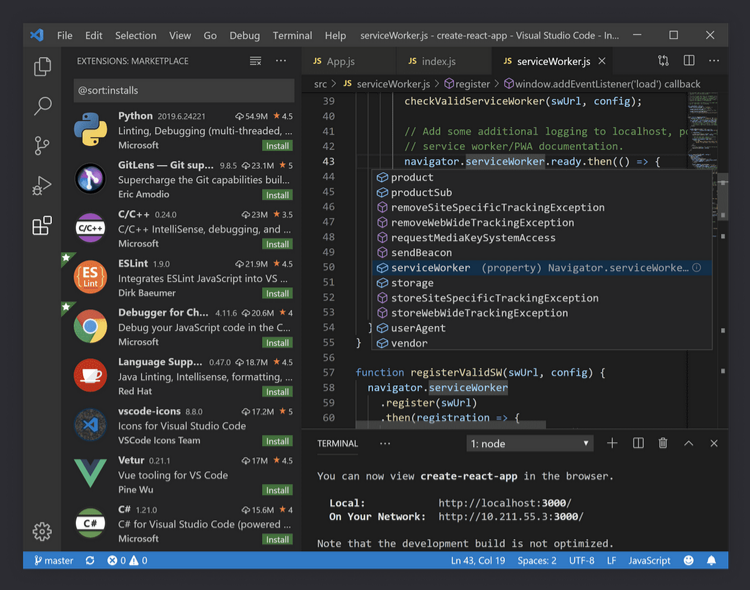
​Visual Studio Code
Visual Studio Code is a free, popular, lightweight and dynamic IDE for programming. It is developed by Microsoft it is free to use and easy to download. It runs on all operating systems and automatically supports Nodejs.
VSCode as it is popularly known has hundreds of plugins to allow developers to write code in multiple languages. It also allows for Git integration right from the IDE, has an inbuilt Command Line Interface among other features that make it one of the best Nodejs IDEs.
Atom
Atom is another lightweight, open-source IDE with Nodejs development capabilities already built-in. HTML, JavaScript and CSS are also already integrated into Atom when you download it onto your device.
GitHub integration, smart autocomplete, easy to customize themes and an in-built package manager are unique features of Atom IDE.
IntelliJ IDEA
IntelliJ IDEA is a lightweight and versatile IDE made by JetBrains.
To start Nodejs development on IntelliJ, you need to download the Nodejs plugin. Many Nodejs developers prefer IntelliJ since it allows them to compile, run and debug Nodejs apps in the IDE. It also has a predictive algorithm that completes code for the developer.
With IntelliJ, you can access the terminal on the IDE, use its inline debugger, database tools and assistance for the framework you are working with.
Komodo
Komodo IDE is another multi-platform Nodejs IDE. When you use this IDE, you can use its built-in browser, create custom configurations and enjoy split and multiwindow editing. Language icons, shortcuts, DOM viewer and graphical debugging are some other features of the Komodo IDE you can use.
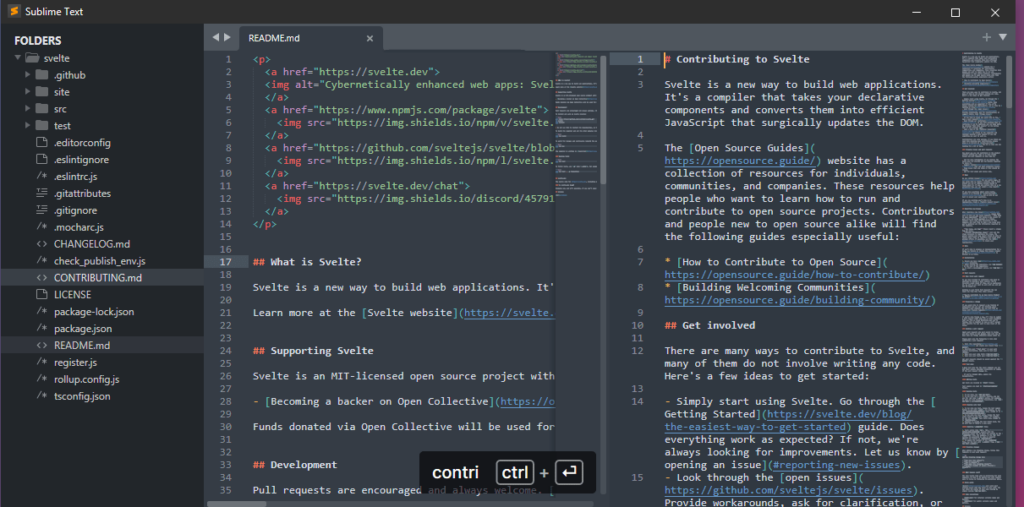
Sublime Text
Sublime is an advanced Nodejs IDE. It is built with custom components to offer powerful features such as multiple selections, speed in file manipulation, split editing, customization and speedy project switching. It also has easy API integration features and can be used on diverse platforms.
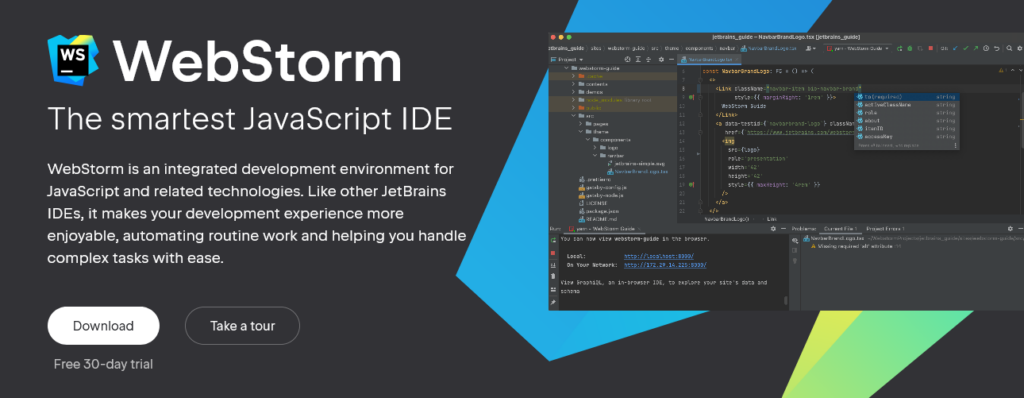
Webstorm
Webstorm is another popular Nodejs IDE built by JetBrains. It is ideal for server-side application development. Thus, it is an ideal IDE for Nodejs development.
With Webstorm, you can enjoy quick error-detection, code completion, seamless tool integration, and easy navigation for Nodejs and other JavaScript development.
Brackets
Brackets is a powerful and versatile IDE used mainly by JavaScript developers. Thus, it is ideal for Nodejs development.
It comes with features such as in-line editing, command line integration, run multiple Nodejs platforms and processes. You can also use it for other languages and it also has code completion for speedy programming.
Vim
Vim is free for Windows and is also available in Unix and Mac. It is light on your device and delivers superior features. To use Vim for Nodejs or another programming language, you need some time to learn all its features.
What are fast, free online IDEs for Node.js
If you don’t want to use the resources on your device, you can opt for online IDEs for Node.js development. Online or cloud-based IDEs are as easy to use as IDEs you download on your device. They have powerful features and capabilities and can be used in place of downloadable IDEs.
Here is a list of fast, free online IDEs for Node.js.
Cloud 9
Cloud 9 is a cloud-based IDE. You can use it to write programming languages such as Node.js, PHP among others languages. It is considered one of the best online IDE with a powerful code editor and debugger. It also has an image editor, live preview and serverless development. It also has an in-built terminal and many other features.
WebMatrix
WebMatrix is a cloud-based IDE developed by Microsoft for Windows users. Developers can create robust applications with Node.js using WebMatrix. It has built-in Node.js templates and databases. It offers cloud publishing and code publishing for quicker development.
Koding
Koding is an open-source and cloud-based IDE. You can use it for Node.js projects and other programs such as Ruby and MySQL. Koding is a powerful IDE. If you are working as a team, it allows two developers to make corrections on the same line of code at the same time with its multi-cursor capabilities.
While working with Koding, you don’t have any hardware challenges, you can deploy multiple VMs and have seamless support for other cloud services. It is flexible, intuitive, and powerful.
Eclipse
Eclipse is a highly popular cloud-based IDE. You can write Nodejs on Eclipse with a plugin on the editor. You can use code refactoring features, error checking, automatic build, and source code generation. You also have Maven and Git integration when working with Eclipse.
What is the most recommended node.js compatible IDE?
As you have seen, there are several IDEs you can use for your Nodejs development. Some are more preferred to others. When it comes to picking one IDE over another, developers check for comfort, ease of use, and extra features such as Git integration and lightweight on your device of choice.
For the cloud-based IDEs, Eclipse is the most preferred and recommended Node.js IDE. It is easy to use and understand. It is predictive and with an automatic build. Eclipse IDE has been in existence for years and has been used by many developers over the years. It has been improved over the years to become the most popular cloud-based Nodejs IDE.
For a desktop Nodejs IDE, Visual Studio Code is the most popular and most recommended. It is a flexible and superior IDE. It is free to download and use. It has an in-built terminal and Git integration. It also has numerous plugins and extensions for ease of use with other programming languages.
Which IDE is lightweight for Node.js?
Developers need their devices to work at high speeds at all times. For this to happen, the IDE used needs to be lightweight enough to allow for speed and accuracy.
Depending on your device specifications, different IDEs will be heavier or lightweight than others. The most lightweight Nodejs IDE is Vim. It works with all operating systems. Although it has a steep learning curve, once you know how to navigate it appropriately, your coding time will be enjoyable.
Vim has numerous features which make it a superior IDE to the rest.
Which is the best IDE for NodeJS and ReactJs
Visual Studio Code, Vim, and Sublime Text are some of the best IDEs you can use for both NodeJS and ReactJs.
When choosing an IDE for whichever language you are coding in, consider some of these aspects of the IDE. First, consider its usability. Check that the user interface is one you understand or you can understand easily.
Also, consider the features of the IDE. Does the IDE have the features you need to develop the application you need to develop? Does it support the language you use? Do you need a plugin or is the support automatic? It ensures that you pick the best IDE for your language.
If you code in multiple languages, you need an IDE that supports all the languages that you are proficient in. You don’t want to change IDEs every time you are working with a different programming language.
You also need to consider your device and the speed of compiling your code in your IDE. Different IDEs use lots of resources on your device. The more lightweight and faster the IDE, the fewer resources it consumes on your device. Depending on the specifications of your device, choose a lightweight IDE all the time.
Can we use Eclipse for Node JS?
Yes, we can use Eclipse to code NodeJS applications.
Eclipse is one of the most popular NodeJS IDE with many users. If you have a large Nodejs project with multiple developers working on it, Eclipse is the best IDE you can use.
Compared to many IDEs, Eclipse is a traditional and futuristic IDE for Nodejs projects. It is an open-source project that is regularly updated and properly maintained. It is cloud-based and provides a perfect developer environment. It has both Git and Maven integration.
In addition, Eclipse has a RESTful API server and fast runtimes. This allows the developer to work accurately and fast. It also has plugins for assembly development, refactoring, and key binding.
Anyone can use Eclipse IDE if they like. It is free and easily available online. It is recommended for all Nodejs developers.
What are some good projects to start Node.js with?
If you are new to Nodejs, there are some projects you can start out with. These are projects through which you will learn Nodejs and implement everything you know about Nodejs.
Some of the best beginner Nodejs projects include a chat application, a personal website, a web scraping tool to get you Nodejs jobs among other beginner level projects.
Regardless of your programming skills, every time you are working with a new language, it is essential to work on several projects. They help you to test out the new concepts you have learned and to understand the new language better.
How to use NodeJS in local IDE after it is installed on Ubuntu server
Nodejs is an open-source server-side framework. It is easily installed in Ubuntu OS devices. Once it is installed, you are ready to start on your Nodejs projects.
Nodejs is preferred since it is a lightweight framework. thus, it compiles faster on any IDE that you use. As a developer, fast compiling code makes it easy and enjoyable to build applications. You can spot and correct errors quickly as you go. It is also supported by all major operating systems a developer may use.
Installing Nodejs in Ubuntu is an easy process. As an experienced developer with good command-line skills, you can download NodeJS into your Ubuntu device in a few easy steps.
To start working with Nodejs in Ubuntu, check the version of Nodejs in your device. On your terminal enter node.js -v to check the version. Depending on the tasks at hand always use the latest version of Nodejs. Also, install and confirm that you have the latest Node.js modules and packages. Now, you are ready to start working on your Nodejs projects.
Create a console application by writing your code on the terminal. A console application is easy to write and run and see its response right on the terminal.
For advanced Nodejs applications, you will need to start your projects by creating a local webserver. If you give your local server a port number, it will listen to the instructions every time it is given and displayed on your device.
You can work with HTML, CSS, and JavaScript to make these simple applications with a server that displays on the screen of your device.
When you are working on Nodejs projects for practice, make sure that you save your projects to GitHub. You can use IDEs with GitHub integration for quick integration. It helps you to monitor your progress as you work on advanced projects.
Are You Confused by The IDE To Choose For Your Nodejs Project?
As we have seen, there are many IDEs to choose from when working on a Nodejs project. It may be confusing when you have heard of all the positive features of the available IDEs to choose from.
As a developer, you need an IDE that is lightweight and easy to use in any type of project. You need an easy-to-use IDE and sometimes it may be difficult to choose especially if you are starting.
Sometimes you are spoiled for choice when it comes to choosing an IDE. You can choose a local or a cloud-based IDE. You may want to know the difference and the benefits of each over the other before you pick one to work on.
Having too many choices is one of the factors that contribute to laziness especially for a new developer. If you analyse too many of the ideal IDEs that you cannot pick one to work with which prevents you from making progress with your projects.
Finally
If you are confused about the IDE to use for your Nodejs project, book a call with us. We will help you choose the best IDE for your project with speed. We will analyse your project, skills, and devices. We will then advise on the best IDE for each of these parameters. In the end, you will know the best IDE to use for your Nodejs project.
I’m an experienced entrepreneur, and I need a CTO to help me grow all of my businesses. I have strengths in operations, sales & marketing and I need someone I can trust to be my technical adviser and lead the technical aspects of the business. I expect you to challenge me, and you will be spoken to like a trusted partner.
I’ve started 5 businesses since I went on my own after working the corporate world in 2006. Since that time, I have sold three of those companies, and am currently running two. If you’re interested, you can read more about my path HERE.
The core business is this website, basically a .NET, node.js, react/angular software development and design company that employs a team of between 35 – 50 developers, and various contractors but growing quickly. Recently, our sales and marketing efforts are gaining strong traction, and I need to take on a CTO to help me grow the company more.
I am also building a software as a service company to help with hiring, which is a major growing pain for us, and our partner projects. I have 12 months of funding to grow this with a full time developer, data scientist, PM and designer. You will also assist with the growth and development of this platform.
You’ll be my trusted number two person, helping me with tasks like –
Managing clients & team meetings
Help find and hire other positions
Run interviews on new hires
Code reviews on your preferred tech stack
Systems architecture planning
Build a best practices training certification for new
Hires based on your recommendations, SaaS best
Practices and Solid Principles/12 factor app
Methodologies
Manage your own team to help your job be easier and
Manage your own workload
Help manage and grow two SaaS companies
Write systems processes for technical teams
Write technical updates on company blog
Vet SaaS companies to purchase to help increase
Gross revenues
Be extremely organised, have growth mentality
Have excellent English writing and grammatical skills
Be comfortable speaking on the phone with people,
Personable, professional demeanor
Ideal candidates will have university education with 3.5 GPA (or international equivalent) with core focus on computer science, managing data structures & scrum, agile methodologies & SaaS best practices.
Perks:
Flexible hours, I don’t care when you work, and I am not going to be monitoring you. Your results should speak for themselves
Have a say in strategy and growth of the company
Your work matters, your input matters
Equity Earn In Option once through the trial period
Previous experience isn’t required, I can train you to do most things, and you’ll be writing up your own processes to train those under you.
You should however have SaaS experience and have at least 8 years of experience developing software.
This is ideal if you are interested in working in a startup, bootstrapped environment, or later want to start, or purchase your own company.
Put in your application what you would like to get paid. If you prove your worth, bring in business and can pitch to me that you are worth more, I’m open to offering equity
In order to reply, email GEORDIE@1STOP.IO and include the Term – #I want to be your CTO
Please include a short 2-3 minute video (you can use LOOM, it’s free of yourself, describing why this is the perfect position for you, and where you see yourself in 5 years and 10 years from now
React is a JavaScript library that facilitates the development of frontend applications in a browser. On the other hand, WordPress is a popular content management system that many websites use. Apart from being user-friendly, it features numerous plugins. How can be ReactJS used in WordPress? Read along to find out.
Can we use React JS in WordPress?
Yes. You can use Reactjs with WordPress in cases where WordPress CMS manages React-based front-end content with the WordPress (WP) Rest Application Programming Interface (API). The WP Rest API is one of the significant WordPress features. It allows developers to build captivating themes and plugins. Through these features, developers can integrate WordPress CMS with third-party applications.
In advanced web applications, the CMS is designed to manage content on a website which can be tedious for the developers. With numerous Rest API possibilities, you can consider utilizing React-based headless CMS with WordPress for their JS (JavaScript) based web apps.
· Understanding Headless CMS
The term headless means that you can leverage the content management system as an all-inclusive CMS regardless of the system used to develop the front-end. Through Rest API developers can collaborate with JavaScript Object Notation-based (JSON) cross-technology interfaces.
WordPress Rest API generates JSON-based data which numerous web technologies can understand with ease. JSON is a text-oriented definition of JavaScript components that comprise key-worth pair data.
Below is an illustration of the potential of WordPress Rest API by combining it with React and WordPress as a headless content management system for a primary web application.
· Establishing a WP (WordPress) Website
Let’s start by establishing a WP website that will be the data source for the frontend React app.
Download a zip file of the WordPress rest API plugin from git and upload it in your WP plugins section. Activate the plugin once the upload is complete. Doing so integrates and enables the WP Rest API in the WP website.
Click Settings, then Permalinks, and choose Custom Structure or Post name. Here, you will be working with API calls and you will need to download Postman, a Chrome extension. Enter the following URL in the Postman.
The URL will collect the posts information on your WP website. To create custom posts, the Custom Post Type UI plugin will come in handy. The custom post will appear when you use React with WordPress in the step below.
After installing and enabling the plugin, proceed to add a new post model. This tutorial covers a custom post format for books. Set the Show in REST API checkbox to true and also activate the Rest API base slug. This step is vital if you plan to use WP as a headless content management system.
Check all boxes for the data you want to acquire from the Rest API and save your changes. A new option will appear in the sidebar. Click to incorporate your new Book in your custom post format. You can create your first book with the sample information provided. To prove the availability of the data through API click on the URL in the postman. Your URL will appear like this:
You can also incorporate other fields such as Publisher with ACF to RestAPI and ACF plugins. Install the two plugins and activate them. Leverage the custom field’s plugin to integrate the Publisher section for your books. Choose your preferred post format from the list then click Publish.
A new location will be created inside your custom post format where you can describe your book’s publisher. You have now created your WordPress for processing your data to the React JS web app.
· Developing a React Application
To develop React-based apps you should first install the following dependencies on your PC.
NPM and Node JS
Git for version regulation
A text editor like visual studio code or sublime
After configuring the environment launch the command line and run the npx create-react-app frontend code to set up the ReactJS-based project. After creating the app, change the directory to the application folder and type npm i Axios to initiate the Axios package installation for API calls.
Launch the folder in your preferred text editor.
Run the npm start command to launch the application
Suppose everything is working well you can start developing your web app with React while using WordPress as a headless content management system. Set up a new component in the SRC folder before setting up a new Books.js file in the components folder.
· Post Data Renderind on ReactJS
In the Book.js file, you will collect the information from the WP Rest API. Use the code below to request the Rest application programming interface end-point, in this instance books. It illustrates the data in JSON format.
import React, ( Component ) from ‘react’
import axios from ‘axios’;
export class Books extends Component (state = (books:[], isLoaded: false)
Instead of illustrating data in this section you can initiate a new component and call it “Bookselements.js” to separate it from the main component. Modify the render mode in the Book.js to:
There are numerous ways of adding Reactjs with WordPress but the ReactPress plugin remains the easiest for adding a React app in a WP page. It lets you leverage the create-react app without adding customized configurations.
ReactPress automates the React integration on your behalf and also guarantees a smooth development experience by running the local React development server with your WP site theme.
· Why you Should not Utilize Headless WP with Server Side Rendering
Headless WP with Gatsby and Next.js or Frontity may be quite popular currently. However, these solutions make your application complex and you may end up losing out a big percentage of the WP ecosystem benefits, in this case, the plugins and themes. Here is the development to deployment steps you should beware of.
Create your local development environment
Download and install ReactPress in your local WP installation
Set up a new React application from the WordPress installation
Set up a new React application by using the default and recommended: create-react-app from the command line, or the local WordPress admin
Build your React application
Develop the application
Download and install ReactPress on a live WP site
Set up the same React application here
Upload your React application project on your live set for deployment.
Remember to repeat the first, second, and third steps until you complete your application.
How can React JS be used in WordPress?
The WordPress plugin leverages a shortcode to produce content from a React application. Remember, the React App is bootstrapped or developed with the Create App command-line tool. If you already have your Node installed proceed with the following steps.
· Create a WordPress plugin
Set up a React application inside the WP plugin with the create-React-application
Modify the React application to ease its loading process in the WP plugin or shortcode by deactivating code splitting for the CSS and asset files.
· Creating a WordPress Plugin
This is a standard single PHP file plugin that you can create in a folder in the WordPress plugins directory. For example, your path/wp-content/plugins/hello_world_react and inside that hello.php.
· Create React Application
Run the following code in the plugin directory from the command line
npx create-react-app helloworldreactapp
For instance: command to your path/wp-content/plugins/hello_world_react and run above cmd.
In the src/index.js modify root to hello-world-react as seen below.
Trigger the application to generate one CSS file and one js file to ease its inclusion in the WordPress plugin. The next part will involve copying and pasting as we shall see below. Create a scripts folder in the React application and include an empty js file known as build-non-split.js. Now copy and paste the following details:
const rewire = require(‘rewire’)
const defaults = rewire(‘react-scripts/scripts/build.js’) // If you ejected, use this instead: const defaults = rewire(‘./build.js’) let config = defaults.__get__(‘config’)
In the React App’s root directory run node package manager rewire in package.json using the following steps.
// Change the line from this:
“build”: “react-scripts build”,
// To this:
“build”: “node ./scripts/build-non-split.js”,
Run npm run-script build to delete package-lock.json as follows.
Enable the plugin from the WP admin plugins
Set up a page and include the hello-world-react shortcode
Proceed to the page where you will identify the React application.
What is the best way to use ReactJS with WordPress?
There are numerous ways of using Reactjs with WordPress. In this section, we shall discuss how to develop an online course eCommerce store, with a special focus on how to create a React app that is connected to WP data powered by the WP Rest API.
· Querying WP Data
Your WordPress website should be running to execute this process. Use WordPress Rest API out of the box from your frontend by sending a GET request to /wp-json/wp/v2/{post type}. For instance, you can draw all your preferred posts from /wp-json/wp/v2/posts. Developers will use the fetch API to make frontend requests as follows.
The above example includes useState and useEffect, two React’s Hooks. useEffect helps declare the series of posts and give a callback to keep it up to date. UseEffect facilitates the running of the fetch code once the element is fixed.
To render a series of posts consider mapping over the posts bundle and return elements for each. Here are some tips to help you figure out how useEffect operates.
The callback can’t restore a promise, meaning passing an async function to useEffect directly is impossible.
An empty series should be approved to useEffect to ensure it runs at once.
· More Customizations
Many React JS and WordPress use cases can be overly complex than the above examples. However, it creates the basis for React and WordPress-powered web applications. Further, it helps developers to understand how the WordPress Rest API works.
To make the process more interesting in this case, consider easing the purchasing process for registered users. To do so you will need to make the price section more visible in the API. There are two concepts of doing so.
For instance, you can leverage post Meta. The most effective way to do so would be from the plugin perspective. However, executing the Meta box to facilitate field editing can be a daunting task.
You could also use custom fields that are directly added from the editor. In this case, you will need to modify the Resty API to make them visible.
Here is how to execute the post-meta-process.
function generate_course_type() {// … previous code from generate_course_type
$meta_args = array(‘type’ => ‘number’, ‘description’ => ‘The price of a course.’,
‘single’ => true, ‘show_in_rest’ => true, ); register_post_meta( ‘course_type’, ‘price’, $meta_args ); By setting show_in_rest to true, it will be exposed automatically to the REST API. Alternatively, custom fields created in WP’s admin interface can be exposed to the REST API by using register_rest_field: function get_price_field($object, $field_name, $value) {return floatval(get_post_meta($object\[‘id’])[$field_name\][0]); }
With the price visible at the Rest API, you can include eCommerce functionalities in the application.
What are the Benefits of using React JS with WordPress?
React js is ideal for both mobile and web development. It also contains numerous developed components that you can use fast. Further, it saves developers from long hours of design. On the other hand, WordPress is a simple and popular method of creating a web application, website, or blog. Many people leverage plugins to customize websites and add various functions. Many WordPress developers prefer React.js because it eases the development of WP websites. Here are some of the benefits of React.js in WP.
· It’s Fast
React.js boosts the website design writing process. Further, the React.js render facilitates the representation of multiple functions. The REDUX can re-render the crucial elements on the web page. Professional frontend WP developers often prefer utilizing React because it renders services fast.
· Enables Developers to Re-Use Code Components
React is an open-source JS, graphical user interface-based (GUI) library. It helps complete user interface functions accurately and efficiently. The core benefit is that through React.js developers can re-use components that were created previously in different platforms that leverage similar functions.
React.js is an effective library that enables users to achieve precision. Further, it allows you to start building a mobile or web-based application with little programming knowledge, or after a few days of using it.
· Enables Developers to Tell the Difference Between Data Separation and Presentation
Developers often lose key data during the rendering process. With React.js, WP developers can keep the data in React state temporarily. WordPress developers leverage the Rest API to discharge data to REDUX. React.js facilitates this data with ultimate presentation and separation. Suppose you store your information in REDUX to facilitate the new rendering process of some files, React.js keeps them in a temporary state.
· Simple Framework
Developers opine that utilizing React.js is way easier than some of the frameworks available today. JSX is a great combination of HTML and JavaScript. The framework is simple, enabling developers to build a website application using the essential programming language.
· Easy to Write
React is usually written in JavaScript Extensible Markup Language (JSX) context. The key objective of JavaScript Syntax Extension in React is to facilitate the navigation of the React components to make it easy and fast.
Conclusion
React and WordPress are excellent website development combinations. While WordPress gives you an easy CMS to manage your content, React provides a massive environment to develop powerful JavaScript apps. Developers can easily use React.js in WordPress as we have seen in this article.
Any technology that enables creating modern themes and apps for a large CMS like WordPress easier is a good thing. Even more so if the technology is not only free and open-source but also well-liked among developers. Frontity WordPress fulfills all of these requirements and more. Continue reading to find out how you can get started.
What Is the Meaning of Frontity?
Frontity is a React framework that helps developers create fast websites, apps, or themes for headless WordPress. It’s the framework you use if you are a React dev but want the CMS functionality of WordPress.
How Frontity Works
The Frontity framework allows developers to create React-based frontends for WordPress. You can create any kind of frontend, be it an app, theme, single-page website, or even a simple blog interface using Frontity. After creating the React frontend, you link it to headless WordPress using a REST API.
Connecting your React. js-based frontend to WordPress means you can take advantage of WordPress’s powerful website administration tools as well as the content management system. For example, you can create a React App frontend that fetches data dynamically from a WordPress backend.
The Frontity web interface or app fetches content from WordPress but runs on a separate Node.js server because WordPress is written in PHP.
In a nutshell, Frontity allows you to:
Code a React frontend with all the good things that come with React JS
Link the React frontend to headless WordPress decoupling WordPress from its PHP-based frontend (no themes!)
Manage your web app or website and add content using WordPress
Frontity is an open and free framework made specifically for WordPress with a ton of documentation for those who want to learn it. It is the ideal WordPress framework for React developers and a more feature-rich alternative to the likes of Next and Gatsby.
Wait, What Is Headless WordPress?
If you are already a WordPress developer or have created themes for WordPress before, then you probably know what headless WordPress is. However, for those new to CMSs, headless WordPress is the CMS without the PHP-generated frontend.
Developers have the freedom to create their WordPress website frontend with whichever language they choose and hook it up with the CMS for content and data management using a Rest API. For instance, you can create your frontend entirely with React and only use the admin console and CMS tools to manage your data and do other configurations.
Frameworks Like Frontity Save You Time
Creating and hooking up a functioning web interface to headless WordPress from scratch can be complicated and time-consuming. This is where frameworks like Frontity come in as they already have many of the scripts and other assets you need to connect to headless WordPress.
Frontity Comes with A Ton of Features and Capabilities
The name frontity doesn’t arouse interest at first especially for devs who build their WordPress themes from scratch. To some, it’s just another framework or library that does what you would typically expect a third-party framework to do.
However, frontity is not your typical framework because it has many powerful features that will make developing for Headless WordPress much easier. Some of the things that make Frontity a good React framework for headless WordPress developers include:
1. Server-Side Rendering with react
Since frontity uses React, themes or sites created with it will use server-side rendering. This enhances site load speeds and SEO. Frontity integrates well with headless WordPress using the REST API. Of course, the same can be achieved without using a framework like frontity but a lot of coding and background setup will be needed.
2. Frontity Is Made for Zero Setup Development
You don’t have to worry about setting up your frontend or WordPress theme from scratch because everything you need is already packaged and ready to use. All the libraries, CSS, headless WordPress REST configurations, binding with Webpack, etc. This will save you a lot of time and resources as you can dedicate your time to creating a good WordPress theme or app interface.
3. Frontity Is Fully Extensible
Using a free and open-source headless WordPress framework like Frontity means you can extend it the way you want to suit your needs. Frontity has been engineered to be extensible through the use of npm packages that are user-created or downloaded from third parties. There is no limit to things you can do with such a simple headless WordPress framework.
4. Frontity Supports Serverless deployment and horizontal scaling
Recognizing the need for lightweight, scalable, and easy to deploy web applications, the Frontity framework is, by design, made for serverless deployment. You can deploy Frontity frontends on serverless services like AWS Lambda. Horizontal scaling is also possible with Node servers.
5. The Framework Supports WordPress Extensions
Tight integration with WordPress using its REST API means the framework can link up with most WordPress add-ons and extensions. You can link up Frontity with already deployed WordPress.com or WordPress.org websites with a few steps.
6. Frontity Support Multi-sites
Just like WordPress, the Frontity framework allows you to link up to more than one website with a single installation. You can even mirror data from one site to another with a single line of code using jQuery.
Other features and unique characteristics of the Frontity headless WordPress framework include:
Code splitting-The framework uses code splitting by design which allows you to create smooth frontends for your web applications.
Supports React concurrent suspense
Supports Typescript- You can use Typescript instead of JavaScript with the framework as it’s supported right off the box
Supports ES6
Frontity is one of the smallest React bundles out there
Instant in-app navigation for smooth user experiences
Frontity is indeed an interesting React framework for headless WordPress. Given the support it’s getting from contributors, the framework will certainly keep getting better and better. The best thing about it though is how easy it is to learn as you shall see in the remaining sections of this tutorial.
Using Frontity With WordPress By Example
This is a step-by-step process using a practical example of how to download, set up Frontity and create your very first Frontity project. Later on, we’ll show you how to connect it to WordPress and edit your app or website.
Requirements
A WordPress installation – this can be a development install hosted locally or a running WordPress install hosted on a live webserver.
A Node.js dev and runtime environment- You should already be running a Node.js runtime environment to use Frontity. Make sure your Node version is 5.20 or higher so that you get access to the pre-bundled Node Package Executer (NPX) CLI tool. You’ll need it to download and install Frontity so you can create your project.
Creating Frontity Project- Step by Step
Creating a Frontity project is the simplest step in the process as you only need two or three CLI commands in a Node.js runtime environment or command line. We recommend that you use a text editor that allows you to launch the node CLI within the editor and view the project files.
Step 1– Open up a Node.js command-line interface
Step 2: Enter the following npx command to download and install the Frontity WordPress framework on your development server:
npx frontity create my-first-frontity-project
Entering this command will download the Frontity framework, install it and execute it. A new Frontity project named “my-first-frontity-project” will be created in your current directory. By the way, you can replace this name with your actual project name from the word go.
Step 3: Next, you will be asked to pick a starter theme. We suggest you with the default Mars theme for now as you will be programming your interface using React anyway.
Step 4: Your new Frontity project should be created at this point and all the necessary start files and directories will be inside the project folder. You can navigate to your project folder with the following command:
cd my-first-frontity-project
Step 5: Now you can execute your new Frontity project and have the demo site show up in your browser. The new project will be launched inside a local development server using Node. Use the following command to do this:
npx frontity dev
At this point, your Frontity project should be up and running and you can view the demo on your website by navigating to localhost:3000 if the site wasn’t automatically launched. You are free to start making changes and building your React app inside the project folder by editing and adding new files.
First things first though, you’ll need to connect your Frontity project to Wp so that it can fetch data from the CMS. You are free to stop after connecting the two and using the default Frontity theme. Next, we show you how to connect Frontity to WordPress.
How do I connect Frontity to WordPress?
You can connect Frontity in very few and straightforward steps using headless WordPress’s REST API. You of course need to be working in a Node development environment, have a server up and running with WordPress installed, and understand how to install and execute node packages using npm and npx.
How to Connect Frontity To WordPress Step by Step
You need to have at least a set frontity to run on your local or webserver to connect it to WordPress.
Step 1: Open your already set up Frontity project folder either through your operating system’s file explorer tool or in your preferred development editor directory listing. The default folder for most Frontity projects is /users/my-project. You can also navigate to this location by using the command cd/users/my-project.
Step 2: Locate the frontity configuration file named “frontity.settings.js” and open it with your development text editor. The file is in the primary project folder.
Step 3: Locate the line with the Frontity API URL in the configuration file you just opened. This is where you will instruct Frontity to point to your WordPress installation as opposed to the demo Frontity page.
By default, a new Frontity install points to demo content on the URL https://test.frontity.org/wp-json. Change that URL to point to your WordPress website on your server. For example, if you have WordPress installed on a local server using XAMMP or WAMP, you could change the URL to something like “https://localhost:8888/wordpress/wp-json”.
By changing your API URL, you will be connecting Frontity to WordPress and essentially telling it to look for content stored in the CMS. The structure of the default React-based Frontity frontend will remain but your WordPress content will be fetched and shown on your browser.
Step 4: Finally, make sure you save the updated frontity.settings.js before you close it. Congratulations, you have successfully connected Frontity to WordPress. The next steps should be to start building your Frontity website or web app using React.
How Do You Use Frontity?
Frontity allows you to code React themes and web interfaces for WordPress. You can create any theme or interface you want from scratch using React or by modifying Frontity themes to your liking.
After creating your first project, your next step should be to start thinking about creating a new package or WordPress theme that includes the following components:
Menus
Post designs
CSS styling
Behavior- for interactive elements like buttons, menus, and animations
Custom post design and other elements depending on the design of your website or app
You use Frontity by linking it to a WordPress hosted on a server. Instead of using the default Wp PHP frontend to manage the display of your website or web application, Frontity will take over. You can even run both frontends side by side as you change from the old PHP-generated interface to the new one.
Use Frontity For Building WordPress Apps
While a typical Frontity setup may be primarily used to create themes and website interfaces that are connected to headless WordPress, you can use its functionality to create powerful apps. This is because Frontity opens up opportunities to use the entire power of React. You can even create single-page applications that utilize the WordPress CMS and dashboard for data management.
On top of the things you can create from scratch, using Frontity also allows you to tap into its rich plugin and package repository. Some of the plugins will allow you to add functionality to your WordPress application without coding while others add new features and styles.
Configuring Your Frontity App
You will be modifying your Frontity app by editing the configuration script inside your project. Most of the settings you need to get your app up and running can be located in the “frontity.settings.js” file that you can open up in your text editor and change the values you need.
For example, you can change the default theme to your new theme by editing the section that contains theme information in the file. Just make sure that you maintain the syntax used in the configuration script. Refer to the Frontity documentation if unsure about anything when configuring your Frontity app.
Styling Your Frontity Theme With CSS-In-JS
You will be using CSS in JS to style or modify the appearance of your Frontity them. Frontity’s CSS in JS is a combination of CSS and React.js that allows you to create React components from HTML tags and style them as you want. It’s a simple but powerful approach to styling your theme that takes advantage of JavaScript dynamic loading and CSS.
Here is an example of Frontity styling done with CSS-in-Js.
Deploying Your Frontity App
The last step after designing your Frontity app or theme is to move it from the Node.js development server environment to a live server where it will be accessible publicly. While it is deployed., it will also maintain the ability to fetch content from your WordPress CMS. You will also be able to use the WordPress dashboard.
There are many services you can use to deploy your Frontity app to the open web but the folks at Frontity recommend using Vercel- a cloud service that is tailor-made for serverless functions. To deploy your Frontity appl on Vercel, you first need to create an account with them. Then you will follow a simple step by step deployment process by Frontity that involves:
Login to your Vercel account using npx
Creating a Vercel.json file and finally deploying your app.
NB: You don’t have to use Vercel when deploying your Frontity apps. There are other similar services out there you can use. However, the deployment process varies depending on the service you choose but it should be simple and quick.
All in all, Frontity is a great React framework you can use to quickly create powerful apps that take advantage of WordPress’s powerful content management features. Book a service with us today if you want your Frontity application developed or need help with your Frontity projects. Happy coding!
Bootstrapping is the process of building a business from scratch using personal savings or the money you earn from your first sales. This process may sound sophisticated, but it is not. Here are tips to help you learn how to bootstrap a SaaS startup business.
Crucial Steps to help you Understand How to Bootstrap a Saas StartUp Business
1. Pre-sell Your SaaS Product Idea
Before embarking on developing a SaaS product for your bootstrapped company, you need assurance that your target customers will pay for it. Pre-selling the product is a perfect strategy for guaranteeing sales before creating the product.
Understanding Preselling
A presale is a targeted approach to acquiring paying customers before introducing your product. Instead of investing a lot of time and money developing the product before the presale, you focus on your vision and discuss it with prospects. Doing so helps you assess whether there is enough demand to fund product development.
Understand how the Target Market Defines their Challenges
Before preparing for your pre-sale you want to understand the challenges that your target customers are facing. How do these challenges affect their daily lives? Interact with potential customers and interview them. Doing so gives you a clear picture of their preferred solution. Incorporate the feedback in your marketing materials and sales pages. Conduct surveys to collect more information from a vast range of potential customers.
Have a Vision for Your SaaS Product
Share your vision with users and let them know what the product will entail. Apart from features, demonstrate how your SaaS product will solve their problems and improve their lives. Share mockups, wireframes, and prototypes to give potential users a clear picture of how the product will function.
Figure out the Amount of Support You will Need
Come up with a plan for the amount of funding you will need or the number of potential customers you will onboard. Research extensively to make sure your numbers are data-based.
Build a Sales Page
Once you have a clear vision to present to potential customers, you can start creating your sales pages. Here are crucial details you should include.
Define your target market clearly. Highlight the challenges they face and mention how your SaaS product will help solve them. Maintain a short and solid headline.
Explain the product you are offering and the benefits that early adopters will get. Let your visitors know that what you are offering is a pre-sale and that their support will be crucial in developing the product.
Include an outline of the SaaS product and its features in visuals
Have a clear call to action
Create an easy process for interested people to contact you for more details or pay for the pre-sale online.
To create a perception of scarcity and urgency, run the pre-sale for a limited time. You can even limit the available slots or incorporate a countdown clock.
Incorporate Social Proof
To ensure potential customers have confidence in your product, you can incorporate reviews from your previous customers. Include quotes and endorsements from people who have already embraced the pre-sale.
Introduce the Pre-sale
Market your pre-sale on various platforms such as your social media pages or WordPress blog. You can even produce a podcast discussing the product and explaining why people should adopt it. Other promotional techniques include:
Working with publications or media outlets that reach your target customers.
Launch your advertisement drives
Asking your followers to share your sales page on their platforms
Sending customized emails to everyone on your email contact list
Creating videos and sharing them on your various social media platforms.
Holding Q$As live to get people talking and develop transparency and trust among your target customers
Close the Pre-sale and Gather Feedback
Do not extend your pre-sale beyond your plans. You can remind people to subscribe as the target date draws close. Thank the participants, and let them know when they can expect feedback from you. Consider sharing your product delivery timeline and templates.
A pre-sale helps you collect development funds and gather feedback from prospective users. It also allows you to spread the word to a broad audience. Leverage this guide to plan and manage your pre-sale successfully.
2. Determine Your Minimum Viable Product (MVP) or Market Fit
As a startup entrepreneur, you need to identify your product/market fit or have the ideal product that your target customers are ready to use or pay for. Further, you should ensure that your product maintains the following components:
An essential product that solves customer’s pain points.
Here are some approaches you can use to create the MVP for your SaaS product.
One Feature Product
Identifying the core feature that offers tangible solutions to the problem is crucial. Forget any other characteristics, or keep them aside for use in subsequent upgrades. Using this approach prevents customers from getting confused by numerous attributes. They will be able to assess the core intention of the SaaS.
Concierge Model
This approach uses minimal or no programming at all. Startup entrepreneurs only need to interact with potential customers and interrogate them before building a landing page. A landing page outlines your service and gives potential customers the option of either signing up or requesting the service. While you can execute the remaining operations manually at the beginning, you may need to adopt automation as the business grows.
3. Landing Page Approach
Create a comprehensive landing page where visitors can learn about your services. You can develop a collection of user emails from a robust landing page. Learn from this scheduling social media posts application. The enterprise leveraged their Pricing and Plans feature on their landing page to develop a two-page minimal viable product.
Whenever visitors clicked on that option, they received a prompt to leave their email addresses to receive a notification once the product was available. With this strategy, the business managed to verify the concept and acquire the prospective customer’s contact details before introducing the product.
The fact that visitors added their email addresses was an indication that they needed the application. With a robust product, all you need to attract numerous potential customers is to release a simple video explaining it.
4. Choose the Ideal Technology Stack
You can build an application in various ways like:
Focusing on the Design from Day One
It is worth mentioning that many of your clients will be bootstrappers, which means they work on a budget. As a Startup SaaS company entrepreneur, focus on the design of your SaaS product from day one.
The ideal SaaS product should cover scalability, security, and performance. Remember, your database will have both individual and company users. Separate access securely to offer the best customer experience.
Choose Experts as Opposed to Technology
Remember, the perfect technology is one that your software development team can execute with minimal struggle. Further, learning a new technology can be complicated than using an already tested, well-known method.
5. Build Your SaaS Content Marketing Strategy for SaaS StarStartup Business
Leverage content marketing to bootstrap your startup business cost-effectively. Studies suggest that content marketing is 62% cheaper than outbound marketing and offers up to six times high conversion rates than other methods.
When getting started, establish low-competition keywords that offer sufficient search traffic for your niche. You can leverage free tools to determine keywords your target audience is searching and the number of people searching for the same. Here are some techniques you can use to create your SaaS content marketing plan.
Determine Keyword Intent
Identify crucial keywords where potential customers are looking for products like yours. Some ideal keywords would be ActiveCampaign versus MailChimp, Basecamp versus Github, or email marketing software for entrepreneurs.
Have a Content Marketing Channel
An effective content marketing channel helps you spend little time persuading leads. While content marketing can be essential, it is also a time-consuming strategy, especially without a proper plan.
You may want to delegate your content creation needs so that you can focus on the more sophisticated matters of your business. Remember, high-ranking content should be targeted to meet the search goals, comprehensive, and backed by case studies and research.
Develop a Customer Feedback Plan
As a startup SaaS business entrepreneur, you should know what your customers say about your brand. The ideal customer feedback strategies comprise response collection from multiple levels such as:
In-application feedback
Periodic surveys
Direct one on one interviews
Exit surveys and exit interviews
At the start, you may want to execute non-scalable tasks like:
Contacting new users
Determining how they plan to use the product, and
How you can assist them
Research suggests that joining groups like VIPs, beta testers, and Facebook groups is an ideal strategy to help you develop a community, show potential customers that you care, and getting valuable feedback.
6. Choose Your Niche
A lot of people strive to develop a million-dollar startup SaaS company by choosing a suitable industry or niche. If you have enough capital to pursue a broader customer base, you can always go for it. However, as a bootstrapped SaaS startUp business, venturing into the larger business space without sufficient cash can be a difficult task.
You will need consistency and robust strategies to build a considerable MRR and even a more tangible ARR for your startup. Remember, you will need to focus on a compatible sub-niche during the early days of your business. The sub-niche will be the driving force for your niche.
7. Develop a Product-based Marketing Plan
Building a $1 million ARR product-based marketing plan would be ideal when starting. With this idea, you will have to use any necessary means to ensure people use your product. Only then can you get feedback from early adopters. To achieve this strategy, you may need to offer a freemium, one of the cost-effective customer acquisition strategies to attract customers. A freemium strategy is ideal when it comes to scaling up your customer base. This strategy does not involve raising money, but it is a powerful marketing technique for startup businesses.
8. Avoid Focusing on Growth
While many startup entrepreneurs prioritize growth, focusing on the churn rate, in the beginning, is more effective. Strive to make every customer happy to promote word of mouth marketing and customer retention. The churn rate metric is one of the best indications of where the business will be in 10 years.
9. Hire as soon as you can
Remember, identifying smart employees who can execute tasks helps you grow your business within a short time. You do not have to handle every part of the business operations. How about delegating various tasks such as:
Running ads on social media platforms
Coding
Content creation, and
Devising robust marketing strategies
Being a co-founder allows you to gain equity from the business whether you are salaried or not.
10. Ignore Competitors
Today, the marketplace is overly crowded, and your business needs to be unique to stand out in the crowd. Focusing on competitors in the current world can be a battle you will never win. While you may want to keep watch of things within your space, avoid investing all your energy in everything your competitor does.
You can hire one person to monitor new technology, trends, and advanced developing markets. Doing so helps your startup SaaS business remain on top of things. The person you choose should interact with both existing and potential customers every day. The right candidate should be futuristic and focused on scaling up the business in the next five years. Focusing on broad ideas helps you become a leader in the industry.
11. Invest in SEO from Day One in SaaS Startup Business
If you want to be running your business in the next ten years, you should invest in search engine optimization. Some people doubt the effectiveness of SEO. However, it is worth mentioning that SEO is still quite robust. SEO is one of the best returns on investment when it comes to advertisements. By investing in SEO, you will be buying leads and earning their dividends for use in the future. Building a robust bootstrapped product requires you to have a versatile marketing funnel.
Take Away
Bootstrapping does not pile pressure on startup entrepreneurs, which allows them to attempt different approaches with their brand.
Lack of funding gives bootstrappers robust creativity, money, and time management skills.
Read our blog for more details about Saas, startups, and bootstrapping SaaS Startup business strategies.